

📅 Published: May 2026 | ✍️ By Brad Andrews | ⏱️ 15 min read
I finally started to get curious about taking advantage of the built-in energy capabilities of Home Assistant and the dashboard it comes with. It made me wonder, what does my usage actually look like day to day and how granular can I get? What will it show be about my house I did not think of before?
The search was quick and obvious as a Z-wave fan to go with the Aeotec Gen 5 Energy monitor and the install was very simple. I will recommend you contact a licensed electrician certified in your area here though, because working in your panel can be dangerous. The Aeotec clamps around the main feeds, however you could choose other feeds depending on what you wish to monitor like a Stove for example. Once clamped on and the panel was closed, I plugged it into power, paired the Z-wave, and waited.
I am naturally a little impatient so this part was hard because refreshing every 5 minutes really will not give you much at all as it takes time to log and build history. Even once running, it really takes days if not weeks to start to give you an idea on patterns as in my case it was just a running total of the entire house. It kind of felt almost underwhelming really.
I carried along and over winter we usually run a Dyson Heat and Cool fan in our basement to help warm it up a little more than it normally sits during winter. This is when I noticed a big difference I had not even thought of before. I noticed when the fan was running in heat mode, the energy usage was spiking each day. So I decided to do the math and figured out that the Dyson fan running in heat mode was actually costing between $20 and $40 each month to run. To make it worse, one of the kids cranked it bringing that monthly bill even higher. This should have been obvious, but being able to calculate the approximate cost realized savings for us that paid for the monitor itself.
That is why energy monitoring can and does matter, not immediately but over time and as you adjust your life. I also have my Tesla usage tracked in Home Assistant and as I have been switching to Inovelli light switches those are reporting their usage in too. This helps give a better idea of where the energy is going and over time I will keep adding more.
I wrote this article to both share my own experiences with AeoTec energy monitor and the Tesla fleet integration so you can start further ahead than I did and a more realistic expectation than me too. I will show you how to tie it all together, the automations my system runs on, and a cost tracker I use to calculate based on my areas time of use billing rates which may apply where you live too.
What You’ll Set Up
By the end of this Blueprint, you’ll have:
- Whole-home energy monitoring through the Aeotec Gen 5, feeding the HA energy dashboard
- Your Tesla connected via the Fleet API integration, surfacing battery level, charge state, location, and more
- Your Tesla Wall Connector running as a separate local integration, providing accurate session energy data
- A set of automations: a low battery alert, a charging complete notification with real cost math, and a driving mode polling routine
- Input number helpers for your Time-of-Use rates so the cost calculations stay accurate when rates change
Part 1: Whole-Home Energy Monitoring
The Aeotec Gen 5 in Home Assistant
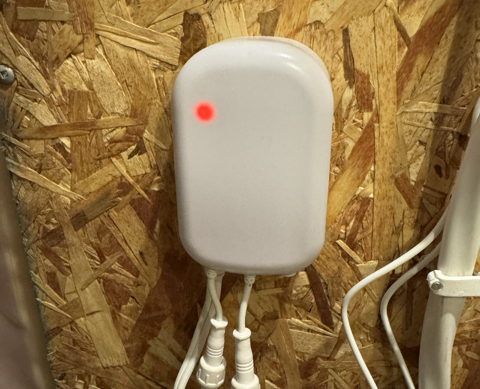
The Aeotec Home Energy Meter Gen 5 (ZW095-A) uses two current transformer clamps that clip around wires inside your electrical panel. Those clamps measure current on each leg of your split-phase 120V service, reporting live wattage and tracking cumulative kilowatt-hours over time. The device body mounts near the panel and plugs into a standard outlet for power.
Live watts plus cumulative kWh is exactly what the HA energy dashboard needs.
Pairing in Z-Wave JS UI
Once the hardware is installed and powered, pairing follows the same process as any Z-Wave device.
- In Home Assistant, go to Settings → Devices & Services → Z-Wave
- Click Add Device
- Tap the action button once on the Gen 5 body
- If prompted for a security PIN, it’s printed on a label on the device. Enter the five-digit code
- Wait one to two minutes while HA pulls in the full device profile
The Gen 5 supports S2 Authenticated encryption. If your network offers it, use it.
Making Sense of the Entity Flood
One thing you will want to be aware of is that the Gen 5 will create a lot of entities. The two clamp version generated 42 entities with some disabled that you can enable if you need them. I did not need to enable any additional for my setup.
For the energy dashboard, the entity you want is:
sensor.home_energy_meter_gen5_electric_consumption_kwh
That’s the total whole-home consumption in kWh, always increasing. It’s the sensor that feeds the energy dashboard as your grid consumption source.
For real-time monitoring, sensor.home_energy_meter_gen5_electric_consumption_w shows your instantaneous whole-home load in watts. That’s the one to watch when you want to see what a specific device is actually drawing. Plug something in, watch it spike. Turn it off, watch it drop. The feedback loop is fast and satisfying.
The per-clamp sensors (the _1 and _2 variants) show individual leg readings. Useful for diagnosing load imbalance across your panel, but not needed for the dashboard.
Go to the device page under Settings → Devices and disable the sensors you won’t use. It makes the entity list much easier to work with.
Configuring the HA Energy Dashboard
- Go to Settings → Dashboards → Energy
- Under Grid consumption, click Add consumption
- Select
sensor.home_energy_meter_gen5_electric_consumption_kwh
You can optionally enter a static cost per kWh here for dashboard cost estimates. However, I track costs through automations instead, which lets me apply the actual TOU rate, the Ontario Electricity Rebate, and HST accurately. The dashboard’s built-in cost feature works, but it’s a simpler approximation.
The energy dashboard builds forward from the moment you configure it. Historical data before that point won’t backfill. Set it up sooner rather than later.
Part 2: Tesla Fleet API Integration
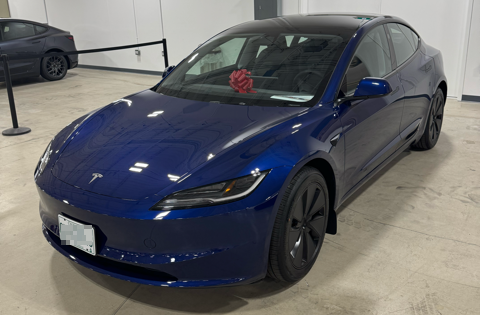
Tesla’s official Fleet API integration has been part of Home Assistant since 2024.8. The setup has more moving parts than most integrations: a developer account, a hosted public key, an OAuth flow, and a virtual key on the car. Each step makes sense once you understand what it’s doing, but going in with the full picture helps.
What You’ll Need Before Starting
- A Tesla account linked to your vehicle
- A separate Tesla Developer account, created at developer.tesla.com
- A way to host a public key file at a publicly accessible HTTPS URL
- The Tesla app on your phone, needed to install the virtual key on the car
Step 1: Create a Tesla Developer Application
Sign into developer.tesla.com and create a new application. Give it a unique name, since no two applications can share the same name across all Tesla developer accounts.
For the Allowed Origin, you’ll enter the URL where your public key will be hosted. You won’t have that URL yet. That’s the next step. For the Redirect URI, enter https://my.home-assistant.io/redirect/oauth.
Select all available scopes when prompted. Missing scopes limits what the integration can do later, and adding them after the fact requires recreating the application.
Tesla will give you a Client ID and Client Secret. Keep both. You’ll need them when adding the integration in HA.
Step 2: Host Your Public Key
The Fleet API requires a public key file to be accessible at a specific path on your origin domain:
https://your-domain.com/.well-known/appspecific/com.tesla.3p.public-key.pemHA generates the key pair automatically during the integration setup. The private key saves to /config/tesla_fleet.key. The public key is what you need to copy out and host somewhere publicly accessible over HTTPS.
The easiest path is a free hosted service built specifically for this purpose. Several exist. Search for “Tesla Fleet public key hosting” and you’ll find current options. These services give you a unique subdomain URL that becomes your application origin. You paste in your public key, and they serve it at the correct path automatically. The whole process takes a few minutes and doesn’t require exposing your own server.
If you already have a publicly accessible NGINX reverse proxy or a domain you control, you can host the file there instead. The only requirement is HTTPS at the correct path.
Step 3: Add the Integration in HA
Go to Settings → Devices & Services → Add Integration and search for Tesla Fleet.
When prompted for application credentials, enter your Client ID and Client Secret from the Tesla Developer portal. Select Tesla Fleet as the integration type.
HA will redirect you to Tesla’s OAuth page. Sign in with your Tesla account and authorise the application. After completing OAuth, HA displays a QR code. This is the virtual key installer for your car.
Step 4: Install the Virtual Key
Open the Tesla app on your phone and scan the QR code shown in HA, or follow the link on your phone directly. Follow the prompts in the Tesla app to install the virtual key onto your vehicle.
The virtual key is what authorises HA to send commands to the car. Without it, the integration works in read-only mode: all the sensors work, but services like locking, unlocking, or HVAC control won’t function.
What Entities You Get
Once set up, the Fleet integration creates a full set of sensors for the vehicle: battery level, charge state, charging amps, estimated range, odometer, shift state, location tracker, inside and outside temperature, and more.
One thing worth noting: the entity IDs don’t include your car’s model name. The battery level sensor will be something like sensor.battery_level rather than sensor.model_3_highland_battery_level. If you have multiple Teslas on your account, you’ll need to check the device page under Settings → Devices to confirm which entity belongs to which car.
The Tesla Wall Connector: A Separate Integration Worth Adding
If you have a Tesla Wall Connector (Gen 3), it has its own local integration separate from the Fleet API. Go to Settings → Devices & Services → Add Integration and search for Tesla Wall Connector. Enter the local IP address of your charger.
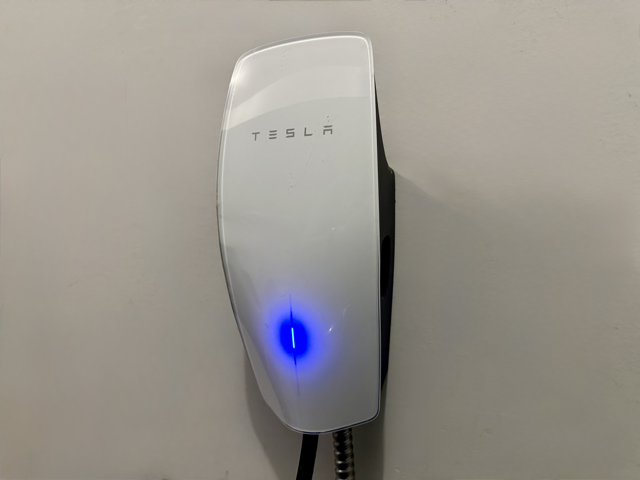
The Wall Connector integration is local, with no cloud setup and no developer account. It surfaces real-time power draw, grid voltage and frequency, and a binary sensor for whether a vehicle is connected. Most usefully, it tracks session energy in kWh, the actual energy delivered during each charge session. That number feeds directly into the cost calculation automation below.
Add it if you have one. Session energy measured at the charger is more accurate than estimating from battery level changes in the Fleet API.
Polling, Sleep, and API Costs
The Fleet integration polls your vehicle every 10 minutes while it’s awake. Tesla provides a $10 monthly API credit, enough to cover most single-vehicle setups without paying anything. You can track your usage in the Tesla Developer Dashboard.
Two things worth knowing before you start building automations:
First, sending commands to the car wakes it up. On modern vehicles, API polling alone doesn’t prevent the car from sleeping. Tesla resolved that in firmware 2023.11 for most recent models. But automations that fire commands repeatedly (HVAC, charge limit changes, locks) will keep the car awake longer than necessary. More awake time means more API calls, so keep command-sending automations deliberately targeted.
Second, overly aggressive automations can push you past the free $10 tier. If you’re running automations that trigger frequently and call Fleet API services, keep an eye on your usage in the developer dashboard for the first few weeks.
Part 3: Automations
These are the automations I actually run. None of them send commands to the car. They read state and surface information. That’s by design. The Tesla app handles charging scheduling more reliably than HA can, and every command HA sends comes with a wake-up cost. What HA adds is the awareness layer: knowing when the charge completes, what it cost, and whether you forgot to plug in.
Setting Up TOU Rate Helpers
Before the cost calculation automations will work, create three input number helpers to store your current Time-of-Use electricity rates. These flow through to every cost calculation, so when the rates change you update one place and everything stays accurate.
Go to Settings → Devices & Services → Helpers → Create Helper → Number and create the following three helpers:
- TOU Rate: Off Peak, entity ID
input_number.tou_rate_off_peak, min 0, max 1, step 0.001, initial value 0.098 - TOU Rate: Mid Peak, entity ID
input_number.tou_rate_mid_peak, same settings, initial value 0.157 - TOU Rate: On Peak, entity ID
input_number.tou_rate_on_peak, same settings, initial value 0.203
Those values reflect Ontario Time-of-Use rates, in dollars per kWh, as set by the Ontario Energy Board in November 2025, in effect through October 2026. Your utility may differ. Check your bill for the rates that apply to you.
A quick note on the schedule: Ontario TOU has two seasonal variants that run May 1 through October 31 (summer) and November 1 through April 30 (winter). The per-kWh amounts stay the same. The time windows shift. In summer, on-peak runs 11am to 5pm on weekdays, aligning with peak air conditioning demand. In winter, on-peak runs 7-11am and 5-7pm instead. Off-peak is always 7pm to 7am on weekdays, plus all weekends and statutory holidays.
Create two more helpers to store the results of each completed charge session:
- Last Tesla Charge: kWh, entity ID
input_number.last_tesla_charge_kwh, min 0, max 200, step 0.01 - Last Tesla Charge: Cost, entity ID
input_number.last_tesla_charge_cost, min 0, max 100, step 0.01
If your utility offers an Ultra-Low Overnight plan (Ontario’s ULO rate runs at roughly 3.9¢/kWh between 11pm and 7am), it’s worth comparing against standard TOU. Your utility likely has a calculator. For my usage pattern, TOU still comes out ahead, but EV owners who charge exclusively overnight during that window may find ULO more attractive.
Automation 1: Low Battery Alert
This runs at 9:45pm every night. If the battery is below 50% and the car isn’t connected to the charger, it sends a push notification. That’s the whole thing.
The logic is simple: you schedule overnight charging through the Tesla app, and it runs during off-peak hours automatically. The only failure mode is forgetting to plug in. This automation catches that before you go to sleep, not when you’re running late in the morning.
yaml
alias: Tesla Low Battery - Not Plugged In
description: >
  At 9:45pm, checks if YOUR_TESLA battery is below 50% and the car is not
  connected to YOUR_WALL_CONNECTOR. Sends a notification to YOUR_PHONE.
mode: single
triggers:
  - platform: time
    at: "21:45:00"
conditions:
  - condition: numeric_state
    entity_id: sensor.YOUR_TESLA_BATTERY_LEVEL
    below: 50
  - condition: state
    entity_id: binary_sensor.YOUR_WALL_CONNECTOR_VEHICLE_CONNECTED
    state: "off"
actions:
  - action: notify.mobile_app_YOUR_PHONE
    data:
      title: "⚡ Tesla: Low Battery, Not Charging"
      message: >
        Tesla is at {{ states('sensor.YOUR_TESLA_BATTERY_LEVEL') }}% and is not plugged in.
        You may want to plug in before tomorrow.
      data:
        tag: tesla_battery_low
        sticky: "false"
Replace sensor.YOUR_TESLA_BATTERY_LEVEL with the battery level sensor from your Tesla Fleet device (found under Settings → Devices → your Tesla). Replace binary_sensor.YOUR_WALL_CONNECTOR_VEHICLE_CONNECTED with the vehicle connected sensor from your Wall Connector integration. Replace notify.mobile_app_YOUR_PHONE with your HA Companion app notify target.
Automation 2: Charging Complete With Cost
When the charge state transitions from charging to complete at home, this automation saves the session kWh and calculates the estimated cost using your stored off-peak TOU rate.
The cost formula applies the Ontario Electricity Rebate (OER) at 23.5% and adds HST at 13%. If you’re outside Ontario or your utility uses different adjustments, change the multipliers to match.
yaml
alias: Tesla Charging Complete - Home Notification
description: >
  When YOUR_TESLA transitions to charging complete at home: saves session kWh
  from YOUR_WALL_CONNECTOR to a helper and calculates estimated cost using the
  off-peak TOU rate with OER rebate (23.5%) and HST (13%) applied.
  Sends notification to YOUR_PHONE.
mode: single
triggers:
  - platform: state
    entity_id: sensor.YOUR_TESLA_CHARGING_STATE
    from: charging
    to: complete
conditions:
  - condition: state
    entity_id: device_tracker.YOUR_TESLA_LOCATION
    state: home
actions:
  - action: input_number.set_value
    data:
      value: >
        {{ states('sensor.YOUR_WALL_CONNECTOR_SESSION_ENERGY') | float(0) | round(2) }}
    target:
      entity_id: input_number.last_tesla_charge_kwh
  - action: input_number.set_value
    data:
      value: >
        {{ (states('sensor.YOUR_WALL_CONNECTOR_SESSION_ENERGY') | float(0)
           * states('input_number.tou_rate_off_peak') | float(0.098)
           * (1 - 0.235)
           * 1.13) | round(2) }}
    target:
      entity_id: input_number.last_tesla_charge_cost
  - action: notify.mobile_app_YOUR_PHONE
    data:
      title: "🔋 Tesla Charging Complete"
      message: >
        ⚡ Tesla fully charged at {{ states('sensor.YOUR_TESLA_BATTERY_LEVEL') }}%

        Session: {{ states('sensor.YOUR_WALL_CONNECTOR_SESSION_ENERGY') | float(0) | round(2) }} kWh
        Est. cost: ${{ (states('sensor.YOUR_WALL_CONNECTOR_SESSION_ENERGY') | float(0)
                       * states('input_number.tou_rate_off_peak') | float(0.098)
                       * (1 - 0.235)
                       * 1.13) | round(2) }} (off-peak rate)
      data:
        tag: tesla_charged
        sticky: "false"
Session energy comes from sensor.YOUR_WALL_CONNECTOR_SESSION_ENERGY, via the Wall Connector integration, not the Fleet API. That sensor measures actual energy delivered during the session, which is more accurate than estimating from battery level changes.
Replace sensor.YOUR_TESLA_CHARGING_STATE with the charging state sensor from your Fleet integration. Replace device_tracker.YOUR_TESLA_LOCATION with the location tracker from the Fleet integration. Replace sensor.YOUR_WALL_CONNECTOR_SESSION_ENERGY with the session energy sensor from your Wall Connector device.
Both input_number actions save kWh and cost to helpers so you can display them on a dashboard tile or reference them elsewhere. The notification itself shows the values inline.
Automation 3: Poll While Driving
The Fleet integration polls your vehicle every 10 minutes while it’s awake. That interval works well for most situations. When you’re actively driving, though, more frequent updates for location, shift state, and battery level are useful, particularly for arrival automations that act on your car being close to home. (See Blueprint #6: Presence Detection for how those work.)
This automation watches your phone’s activity sensor. When the iOS companion app reports Automotive activity, it kicks off a polling loop that refreshes the key Fleet entities every 10 minutes. When the activity changes, the loop stops automatically.
yaml
alias: Tesla - Poll While Driving
description: >
  When YOUR_PHONE reports Automotive activity, polls Tesla Fleet API entities
  every 10 minutes to keep location, battery level, and shift state current.
  Stops automatically when driving activity ends.
mode: single
triggers:
  - platform: state
    entity_id: sensor.YOUR_PHONE_ACTIVITY
    to: Automotive
actions:
  - repeat:
      while:
        - condition: state
          entity_id: sensor.YOUR_PHONE_ACTIVITY
          state: Automotive
      sequence:
        - action: homeassistant.update_entity
          data:
            entity_id:
              - sensor.YOUR_TESLA_SHIFT_STATE
              - device_tracker.YOUR_TESLA_LOCATION
              - sensor.YOUR_TESLA_ODOMETER
              - sensor.YOUR_TESLA_BATTERY_LEVEL
        - delay:
            minutes: 10
Replace sensor.YOUR_PHONE_ACTIVITY with the Activity sensor from your iOS HA Companion app device. Replace the Tesla entity IDs with the corresponding Fleet sensors from your Tesla device page.
This automation reads state. It doesn’t send any commands, so it doesn’t wake the car. It simply asks the Fleet API for the latest available data.
On Charging Schedules
I don’t use HA to schedule when the Tesla charges. The Tesla app handles that reliably through its built-in scheduled departure feature. You set a departure time, tell it the charge target, and the car figures out when to start based on your utility rates if you’ve configured them. It runs consistently without any HA involvement.
What HA adds to the charging side of things is visibility: knowing when a session completes, what it cost, and having that information available on a dashboard. The two work well together without overlap.
If you want HA to directly control charging (setting charge limits, starting and stopping sessions programmatically), the Fleet integration has the services for it. Just be deliberate about trigger conditions. Every command wakes the car, and a poorly scoped trigger that fires repeatedly can burn through your $10 monthly API credit quickly.
What You’ll Actually Find Out
The Dyson discovery was mine and yours will probably be something different, it just matters that you now have the insight to know.
Whole-home energy monitoring has a way of surfacing surprises you’d never think to check. Standby draw from devices you thought were off. A hot water heater cycling more often than you expected. A chest freezer in the garage that costs more per month than the food inside it is worth.
The Gen 5 shows whole-home consumption, not per-device. To identify a specific device, you turn it off and watch the wattage drop. Or plug it in and watch it spike. It’s an old technique, but it still works, and the HA energy dashboard makes the before-and-after comparison clear.
Over time, the data changes how you think about the house. Monthly energy trends, daily cost estimates, the shape of your consumption across the day. Once the energy dashboard is running alongside your Tesla cost tracking, you start to see the actual cost of the decisions you make: the fan you leave running, the charge session you forgot to schedule for off-peak.
What’s Next
I want to share more with you all about how each room works in my home and also progress happening on the Smart Gym. There are setups worth documenting that don’t fit neatly into a Blueprint structure also such as my sports automations with a goal light, integrating my pool and hot tub, and making the most of announcements vs notifications.
If you’re just starting out, Blueprint #1: Installing Home Assistant From Scratch is where this blueprint series originally began. Everything in this Blueprint builds on a working HA setup.
Smart Home Secrets is reader-supported. We may earn a commission if you buy through our links.