📅 Published: June 2026 | ✍️ By Brad Andrews | ⏱️ 15 min read
Around 10 years ago now, a friend of mine was showing off his Control4 system and what it could do. He used it mostly for what a Harmony remote could do with a fancier control panel and was slowly adding lights. Control4 was getting ready to offer light switches with multi-tap and backlit colours to them that he was planning on adding to his system when they came out. The problem he faced was he could not do anything himself and had no choice but to pay premium prices for hardware and call a dealer every time to make changes or install things at an expensive hourly rate, mostly meaning things he wanted did not end up getting done.
I have since added switches from both HomeSeer and Inovelli that support multi-tap and LED colours while his system still to this day does not have either feature added. I can install myself, at my own pace, and for a fraction of what his costs, and I can change or add automations any time in minutes. His Control4 system costs way more and is still lagging behind.
Multi-tap with my Z-Wave switches treats single tap as a normal switch operation, up and down for on and off. Beyond that it knows the difference of double, triple, quad, and held down taps which will not control the light but instead be sent to Home Assistant to do different actions or automations. This means your switch is immediately both a smart light switch but also a programmable button hardwired on the wall, no battery required. It will control the light but can also activate scenes, fireplaces, other lights, lamps, heating or cooling, robot vacuums, essentially anything connected via Home Assistant.
The next feature and one I only really started using more and more this year, is the LED bar or lights as a notification manner. Home Assistant will change colours and can use different patterns like flash, pulse, solid to alert you to things. My neighbourhood picks up garbage and recycling every Monday morning so Sunday night the entire main floor switches all flash green to remind me to get everything ready. An actionable notification to my phone has a button I click when I am done to clear the flashing green lights. Now if the switches all over the house start flashing a cyan blue, well better check the basement as that means the leak sensor tripped.
I will walk you through how I use these both in my home and how you can copy what I have or build your own unique and helpful notification and control setup.
How Multi-Tap Works in Home Assistant
When you double-tap up on a compatible Z-Wave switch, the switch sends a Central Scene notification over Z-Wave. Home Assistant receives it through the Z-Wave JS integration and exposes it as a device trigger or event entity depending on the switch model. The values you work with are:
- Scene key: which button was used (001 for the down paddle, 002 for the up paddle, 003 for a dedicated scene key if your switch has one)
- Value: what type of press it was (1 = released, 2 = held, 3 = double tap, 4 = triple tap, 5 = tap-tap-hold)
In the automation editor, go to Add Trigger → Device, pick your switch, and every tap combination appears in the list. No YAML required to set up the trigger, though I am sharing full YAML below so you can see exactly what it looks like and copy it directly.
One thing worth knowing before you start: on HomeSeer switches and some older Z-Wave dimmers, the on paddle is 001 and the off paddle is 002. In Home Assistant with Z-Wave JS on Inovelli switches, it is reversed. Off is 001, on is 002. Inovelli counts from the bottom of the switch up, so it makes sense once you know that. But if your double-tap up automation is triggering when you tap down, that is the reason why. Check your switch model and test one automation before you build the whole set.
What Switches Support This
Not every Z-Wave switch does multi-tap well. The two I use most across my house are:
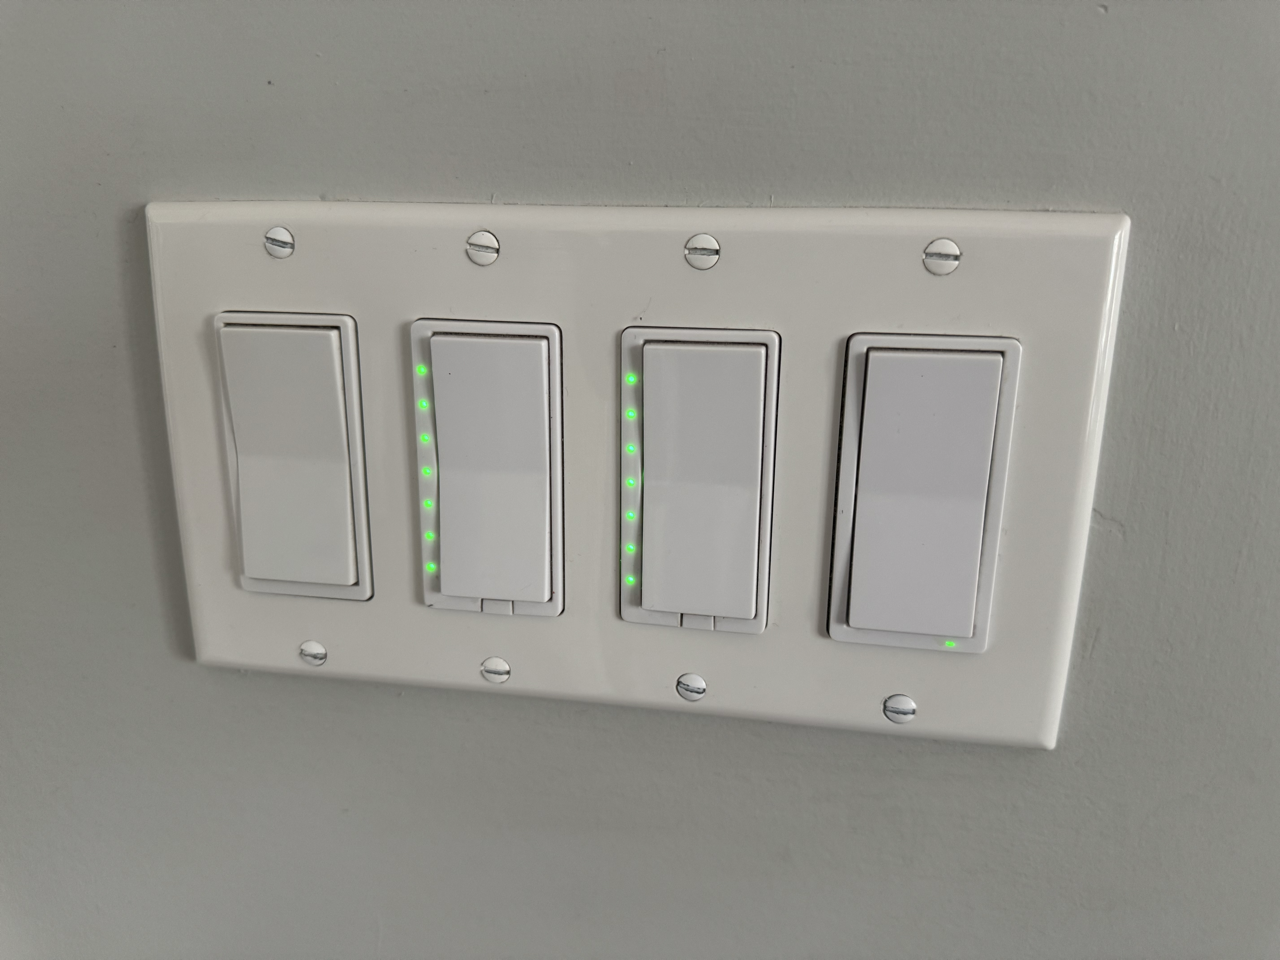
Inovelli VZW31-SN: This is what I am standardizing on going forward. It has a dedicated scene key (the small button above the main paddle), a full LED bar you can control from Home Assistant, and mmWave presence sensing built in. I bought my first one specifically for the scene key and the LED bar. The mmWave came later and became its own reason to keep buying them. The scene key matters because it is physically separate from the paddle. No risk of triggering a scene accidentally when you just want to turn the light on.
HomeSeer HS-WD200+: I have a mix of these and Inovellis throughout the house. The HS-WD200+ supports Central Scene and has seven individual status LEDs down the face of the switch. They do not have a dedicated scene key, so all your tap combinations come from the main paddle. They still work well for multi-tap and the LED capability is genuinely useful, just in a different form than the Inovelli bar.
If you are not sure whether your switch supports Central Scene, go to Settings → Devices & Services → Z-Wave JS, find your switch, and look for entities with “scene” in the name. If they are there, you are set.
The Office: Smart Bulb Mode and a Second Lighting Layer
My office wall switch is an Inovelli VZW31-SN running in smart bulb mode. The overhead fixture has three Govee Edison bulbs controlled over local LAN, so the switch stays powered on at all times and passes commands through to the bulbs rather than cutting their power directly. Single tap controls the overhead as normal.
On top of that I have four additional automations running from the same switch.
Double tap up turns on a Govee uplighter lamp in the corner. Late at night when I do not want the overhead on, one double tap switches me to the lamp without touching my phone.
Double tap down turns that lamp off.
Triple tap up turns on the desk lamp.
Triple tap down turns the desk lamp off.
One switch, three lighting zones. The overhead, the uplighter, and the desk lamp, all from the same spot on the wall.
Here is the YAML for the double-tap up to turn on the lamp, and double-tap down to turn it off:
yaml
alias: YOUR_ROOM Wall Switch Double Tap Up - Lamp On
description: >
  Double tap up on the wall switch turns on the secondary lamp,
  separate from the overhead light controlled by single tap.
mode: single
trigger:
  - platform: device
    device_id: YOUR_SWITCH_DEVICE_ID
    domain: zwave_js
    type: event.value_notification.central_scene
    property: scene
    property_key: "002"
    endpoint: 0
    command_class: 91
    subtype: Endpoint 0 Scene 002
    value: 3
action:
  - action: light.turn_on
    target:
      entity_id: light.YOUR_LAMP_ENTITY
yaml
alias: YOUR_ROOM Wall Switch Double Tap Down - Lamp Off
description: >
  Double tap down on the wall switch turns off the secondary lamp.
mode: single
trigger:
  - platform: device
    device_id: YOUR_SWITCH_DEVICE_ID
    domain: zwave_js
    type: event.value_notification.central_scene
    property: scene
    property_key: "001"
    endpoint: 0
    command_class: 91
    subtype: Endpoint 0 Scene 001
    value: 3
action:
  - action: light.turn_off
    target:
      entity_id: light.YOUR_LAMP_ENTITY
Replace YOUR_SWITCH_DEVICE_ID with the device ID from your switch’s page in Z-Wave JS (Settings → Devices & Services → Z-Wave JS → your switch → the device ID appears in the URL). Replace light.YOUR_LAMP_ENTITY with your lamp. The property_key controls which paddle: 001 is down, 002 is up on Inovelli switches. The value: 3 means double tap. Use value: 4 for triple tap.
The Kitchen Island: Counter Light for Midnight Water Runs
The kitchen island switch and the under-cabinet counter lights are two separate circuits. The island overhead is fine for cooking and daytime use. But getting a glass of water at midnight with the full island light on is rough when you are half asleep. Too bright, right in your face, wakes you up more than you want.
Double tap up on the island switch turns on just the counter lights instead. Soft background light under the cabinets, nothing overhead, just enough to see what you are doing. Double tap down turns them off again. Single tap still works normally for the overhead when you actually need it.
yaml
alias: Island Light Double Tap Up - Counter Light On
description: >
  Double tap up on the kitchen island switch turns on the counter lights.
  Softer option for low-light use without the full overhead.
mode: single
trigger:
  - platform: device
    device_id: YOUR_ISLAND_SWITCH_DEVICE_ID
    domain: zwave_js
    type: event.value_notification.central_scene
    property: scene
    property_key: "002"
    endpoint: 0
    command_class: 91
    subtype: Endpoint 0 Scene 002
    value: 3
action:
  - action: light.turn_on
    target:
      entity_id: light.YOUR_COUNTER_LIGHT
yaml
alias: Island Light Double Tap Down - Counter Light Off
description: >
  Double tap down on the kitchen island switch turns off the counter lights.
mode: single
trigger:
  - platform: device
    device_id: YOUR_ISLAND_SWITCH_DEVICE_ID
    domain: zwave_js
    type: event.value_notification.central_scene
    property: scene
    property_key: "001"
    endpoint: 0
    command_class: 91
    subtype: Endpoint 0 Scene 001
    value: 3
action:
  - action: light.turn_off
    target:
      entity_id: light.YOUR_COUNTER_LIGHT
Most kitchens have a primary overhead and a secondary task or accent light on a separate circuit. This pattern connects them through the same switch without any rewiring.
The Deck: Fence Lights from the Pots Switch
The deck pot lights and the fence lights are two separate circuits. The deck switch controls the pots. The fence lights used to mean walking to a switch on the other side of the door.
Double tap up on the deck pots switch now turns on the fence lights alongside. Double tap down turns them off. Heading out for the evening means one tap for pots only, double tap for pots and fence together. Coming back in at the end of the night, double tap down shuts everything off in one motion from wherever you are standing.
yaml
alias: Deck Pots Double Tap Up - Fence Lights On
description: >
  Double tap up on the deck pots switch turns on the fence lights.
mode: single
trigger:
  - platform: device
    device_id: YOUR_DECK_SWITCH_DEVICE_ID
    domain: zwave_js
    type: event.value_notification.central_scene
    property: scene
    property_key: "002"
    endpoint: 0
    command_class: 91
    subtype: Endpoint 0 Scene 002
    value: 3
action:
  - action: light.turn_on
    target:
      entity_id: light.YOUR_FENCE_LIGHTS
yaml
alias: Deck Pots Double Tap Down - Fence Lights Off
description: >
  Double tap down on the deck pots switch turns off the fence lights.
mode: single
trigger:
  - platform: device
    device_id: YOUR_DECK_SWITCH_DEVICE_ID
    domain: zwave_js
    type: event.value_notification.central_scene
    property: scene
    property_key: "001"
    endpoint: 0
    command_class: 91
    subtype: Endpoint 0 Scene 001
    value: 3
action:
  - action: light.turn_off
    target:
      entity_id: light.YOUR_FENCE_LIGHTS
The Master Bedroom: Four Switches, One TV Remote
My master bedroom has four switches side by side at the entrance. All four control different bedroom lights. I also have an Apple TV in there, and the scene key on each Inovelli gives me a fourth button that does not interfere with the paddle at all.
Each scene key is mapped to a different Apple TV source: Plex, Disney+, YouTube, and live TV. Press the scene key on the first switch, the Apple TV turns on and opens Plex. Second switch opens Disney+. Third YouTube. Fourth live TV. Double tap on any of the four turns the Apple TV off.
The source-switching automation needs a 5-second delay after turning the TV on before sending the source command. The Apple TV needs a moment to wake up before it can accept an input selection. Without the delay the command fires before the TV is ready and nothing happens. That delay step is not optional.
yaml
alias: Master Bed Wall Switch 1 Scene Key - Open Plex
description: >
  Press the scene key on the first bedroom switch to turn on the Apple TV
  and open Plex. 5-second delay gives the Apple TV time to wake up before
  the source command fires.
mode: single
trigger:
  - platform: device
    device_id: YOUR_MASTER_BED_SWITCH_1_DEVICE_ID
    domain: zwave_js
    type: event.value_notification.central_scene
    property: scene
    property_key: "003"
    endpoint: 0
    command_class: 91
    subtype: Endpoint 0 Scene 003
action:
  - action: media_player.turn_on
    target:
      entity_id: media_player.YOUR_BEDROOM_APPLE_TV
  - delay:
      seconds: 5
  - action: media_player.select_source
    target:
      entity_id: media_player.YOUR_BEDROOM_APPLE_TV
    data:
      source: Plex
Copy this automation for Disney+, YouTube, and your live TV source. Change source: Plex to the exact source name from your Apple TV’s source_list attribute. Check under Developer Tools → States, find your Apple TV media player entity, and look at the source_list attribute for the exact strings.
The TV off automation listens to all four switches at once:
yaml
alias: Master Bed - Any Wall Switch Double Tap - Apple TV Off
description: >
  Double tap down on any of the four master bedroom switches turns off
  the Apple TV. All four switches share one automation via multiple triggers.
mode: single
trigger:
  - platform: device
    device_id: YOUR_MASTER_BED_SWITCH_1_DEVICE_ID
    domain: zwave_js
    type: event.value_notification.central_scene
    property: scene
    property_key: "003"
    endpoint: 0
    command_class: 91
    subtype: Endpoint 0 Scene 003
    value: 3
  - platform: device
    device_id: YOUR_MASTER_BED_SWITCH_2_DEVICE_ID
    domain: zwave_js
    type: event.value_notification.central_scene
    property: scene
    property_key: "003"
    endpoint: 0
    command_class: 91
    subtype: Endpoint 0 Scene 003
    value: 3
  - platform: device
    device_id: YOUR_MASTER_BED_SWITCH_3_DEVICE_ID
    domain: zwave_js
    type: event.value_notification.central_scene
    property: scene
    property_key: "003"
    endpoint: 0
    command_class: 91
    subtype: Endpoint 0 Scene 003
    value: 3
  - platform: device
    device_id: YOUR_MASTER_BED_SWITCH_4_DEVICE_ID
    domain: zwave_js
    type: event.value_notification.central_scene
    property: scene
    property_key: "003"
    endpoint: 0
    command_class: 91
    subtype: Endpoint 0 Scene 003
    value: 3
action:
  - action: remote.turn_off
    target:
      entity_id: remote.YOUR_BEDROOM_APPLE_TV
One automation covers all four switches. Note it uses the remote domain for power off, not media_player. The remote entity handles Apple TV power reliably where media_player.turn_off sometimes does not.
The Basement Stairs: One Switch Controls the Whole Floor
The basement stair switch is at the top of the stairs, the first thing you hit on the way down and the last thing you pass on the way back up. Single tap works as normal for the stair light itself. But double tap turns the whole basement on or off in one motion.
Double tap up turns on every basement light: hall pots, media room pots, lounge pots, and the playroom — plus powers on the Media Room Apple TV at the same time. One tap at the top of the stairs and the whole floor is ready.
Double tap down turns off all of those lights and shuts down the Media Room Apple TV. Walk up the stairs, double tap, done.
The TV side is worth explaining because there are two ways to handle it depending on your setup. If you have CEC enabled between your TV and Apple TV, turning off the Apple TV is enough. The TV receives the CEC signal and powers itself down automatically. One remote command handles both devices. If CEC is not set up or your TV does not support it reliably, you will need to send a separate off command to the TV as well, either through an Android TV remote entity or an IR blaster. Check whether your TV turns off when you power down the Apple TV through Home Assistant first — if it does, CEC is working and you only need the one action.
yaml
alias: Basement Stairs Double Tap Up - All Basement On and TV On
description: >
  Double tap up on the basement stair switch turns on all basement lights
  and powers on the Media Room Apple TV. Single tap still controls the
  stair light as normal.
mode: single
trigger:
  - platform: device
    device_id: YOUR_BASEMENT_STAIR_SWITCH_DEVICE_ID
    domain: zwave_js
    type: event.value_notification.central_scene
    property: scene
    property_key: "001"
    endpoint: 0
    command_class: 91
    subtype: Endpoint 0 Scene 001
    value: 3
action:
  - action: remote.turn_on
    target:
      entity_id: remote.YOUR_MEDIA_ROOM_APPLE_TV
  - action: light.turn_on
    target:
      entity_id:
        - light.YOUR_BASEMENT_HALL_LIGHTS
        - light.YOUR_MEDIA_ROOM_LIGHTS
        - light.YOUR_BASEMENT_LOUNGE_LIGHTS
        - light.YOUR_PLAYROOM_LIGHT
yaml
alias: Basement Stairs Double Tap Down - All Basement Off and TV Off
description: >
  Double tap down on the basement stair switch turns off all basement
  lights and the Media Room Apple TV. If CEC is enabled, the TV will
  power off automatically when the Apple TV turns off.
mode: single
trigger:
  - platform: device
    device_id: YOUR_BASEMENT_STAIR_SWITCH_DEVICE_ID
    domain: zwave_js
    type: event.value_notification.central_scene
    property: scene
    property_key: "002"
    endpoint: 0
    command_class: 91
    subtype: Endpoint 0 Scene 002
    value: 3
action:
  - action: remote.turn_off
    target:
      entity_id: remote.YOUR_MEDIA_ROOM_APPLE_TV
  - action: light.turn_off
    target:
      entity_id:
        - light.YOUR_BASEMENT_HALL_LIGHTS
        - light.YOUR_MEDIA_ROOM_LIGHTS
        - light.YOUR_BASEMENT_LOUNGE_LIGHTS
        - light.YOUR_PLAYROOM_LIGHT
Replace YOUR_BASEMENT_STAIR_SWITCH_DEVICE_ID with your stair switch device ID. Replace each light entity with the actual entity IDs for your basement zones — these may be individual lights, groups, or light helper entities depending on how your basement is set up. Replace remote.YOUR_MEDIA_ROOM_APPLE_TV with your Apple TV remote entity.
Note the property_key values here. On this particular switch the double tap up uses 001 (down paddle) and double tap down uses 002 (up paddle). That is the opposite of the office switch. This is the HomeSeer vs Inovelli numbering difference mentioned earlier. Always test one tap combination first and check which paddle actually fired before building the rest.
The Whole House: All Off from Any Foyer Switch
This one gets used more than I expected.
Five switches in the foyer and hallway on the first floor. Any one of them, double tap down, turns off every light on every floor of the house plus every switch. It works as a leaving shortcut and a going-to-bed shortcut in the same gesture.
The action uses Home Assistant’s floor-level targeting rather than a list of individual entity IDs. That means it updates automatically as devices are added to rooms. No need to touch this automation when a new light goes in somewhere.
yaml
alias: All Off - Any Foyer Switch Double Tap Down
description: >
  Double tap down on any foyer or hallway switch turns off all lights
  and switches on every floor. For leaving home or heading to bed.
mode: single
trigger:
  - platform: device
    device_id: YOUR_FOYER_SWITCH_1_DEVICE_ID
    domain: zwave_js
    type: event.value_notification.central_scene
    property: scene
    property_key: "002"
    endpoint: 0
    command_class: 91
    subtype: Endpoint 0 Scene 002
    value: 3
  - platform: device
    device_id: YOUR_FOYER_SWITCH_2_DEVICE_ID
    domain: zwave_js
    type: event.value_notification.central_scene
    property: scene
    property_key: "002"
    endpoint: 0
    command_class: 91
    subtype: Endpoint 0 Scene 002
    value: 3
  # Add remaining switches following the same pattern
action:
  - action: light.turn_off
    target:
      floor_id:
        - YOUR_FLOOR_ID_1
        - YOUR_FLOOR_ID_2
        - YOUR_FLOOR_ID_3
  - action: switch.turn_off
    target:
      floor_id:
        - YOUR_FLOOR_ID_1
        - YOUR_FLOOR_ID_2
Floor IDs are found under Settings → Areas & Zones → Floors, or in the URL when you click on a floor. This requires your rooms and floors to be set up in Home Assistant, which is worth doing regardless of this automation. It makes everything else cleaner too.
The Hold-to-Dim Pattern
While covering what the Inovelli can do, the hold behaviour is worth mentioning because it is easy and the result feels good.
Holding the up paddle sends value 2, a held event. I use it to ramp brightness to 100% over six seconds. Releasing sends value 1, which a companion automation catches. That companion reads the current brightness at the moment of release and re-sets it with a zero-second transition, effectively freezing the light exactly where your finger left the paddle.
Without the stop automation, the light keeps ramping to 100% after you let go. With it, hold-to-dim feels like an analogue slider.
yaml
alias: YOUR_ROOM Dimmer Hold Up - Ramp to Full
description: >
  Hold the up paddle to ramp the light to 100% over 6 seconds.
  The companion stop automation freezes brightness on release.
mode: restart
trigger:
  - platform: device
    device_id: YOUR_SWITCH_DEVICE_ID
    domain: zwave_js
    type: event.value_notification.central_scene
    property: scene
    property_key: "002"
    endpoint: 0
    command_class: 91
    subtype: Endpoint 0 Scene 002
    value: 2
action:
  - action: light.turn_on
    target:
      entity_id: light.YOUR_LIGHT_ENTITY
    data:
      brightness_pct: 100
      transition: 6
yaml
alias: YOUR_ROOM Dimmer Hold Up Released - Freeze Brightness
description: >
  When the up paddle is released, freeze brightness at its current value
  by re-setting it with a zero-second transition.
mode: single
trigger:
  - platform: device
    device_id: YOUR_SWITCH_DEVICE_ID
    domain: zwave_js
    type: event.value_notification.central_scene
    property: scene
    property_key: "002"
    endpoint: 0
    command_class: 91
    subtype: Endpoint 0 Scene 002
    value: 1
action:
  - action: light.turn_on
    target:
      entity_id: light.YOUR_LIGHT_ENTITY
    data:
      brightness: "{{ state_attr('light.YOUR_LIGHT_ENTITY', 'brightness') }}"
      transition: 0
The ramp uses mode: restart so continued holding smoothly restarts the transition. The stop uses mode: single because you only need one freeze at the moment of release.
The Other Thing Your Switch Can Do: LED Status Notifications
This is the feature my friend wanted alongside multi-tap. His switches flashing green on garbage night. He still does not have it. Mine do.
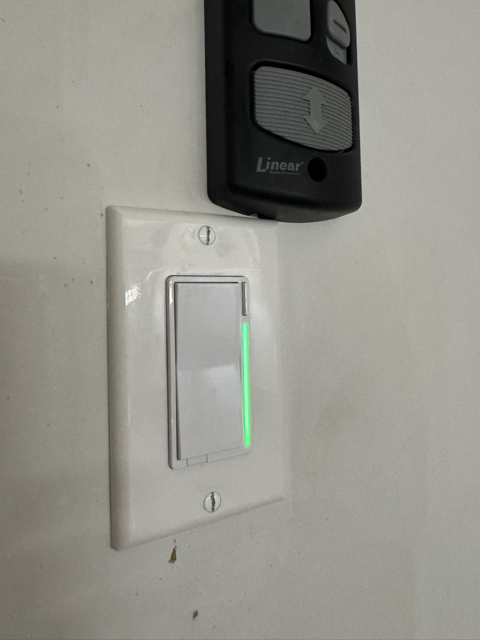
The LED indicator on supported Z-Wave switches is controllable from Home Assistant. Change its colour. Set it to pulse or chase. Use it to communicate something without making any sound, without sending a notification to anyone’s phone, without asking a voice assistant. The information is just there on the wall when you walk past.
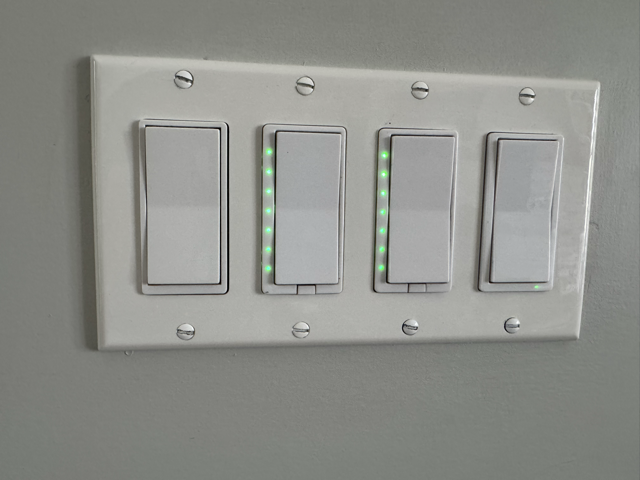
My waste collection reminder does exactly this. Every Sunday evening at 8 PM, an automation figures out what goes out the next morning: garbage and recycling, or recycling only, depending on the week — checks the house calendar for any special pickups like yard waste or oversized items, then sends a notification to both phones and simultaneously turns a set of switch LEDs green across the house. Walk past the foyer switches Sunday night, they are green. That is the reminder.
When the bins are out and either Kelly or I tap “All Done” on the phone notification, the LEDs clear back to normal.
The Inovelli approach: LED bar entities
For Inovelli switches, Home Assistant exposes the LED bar as a set of entities you can control directly without touching raw Z-Wave parameters. The simplest approach for a solid colour effect uses three entities:
select.YOUR_SWITCH_all_led_strip_effect_effect: set to the effect type (e.g.Solid)number.YOUR_SWITCH_all_led_strip_effect_color: the colour as a 0–255 hue value (85 = green)number.YOUR_SWITCH_all_led_strip_effect_level: brightness, 0–100
yaml
# Inovelli VZW31-SN — Turn LED bar green (solid)
- action: select.select_option
  target:
    entity_id: select.YOUR_INOVELLI_SWITCH_all_led_strip_effect_effect
  data:
    option: Solid
- action: number.set_value
  target:
    entity_id: number.YOUR_INOVELLI_SWITCH_all_led_strip_effect_color
  data:
    value: 85
- action: number.set_value
  target:
    entity_id: number.YOUR_INOVELLI_SWITCH_all_led_strip_effect_level
  data:
    value: 70
To clear it, set the effect back to "Clear" or "Off" depending on your firmware version.
The available effect options (Solid, Chase, Fast Blink, Slow Blink, Pulse) are all in that select entity. Check the options in Developer Tools → States to see exactly what your firmware exposes.
The HomeSeer approach: raw Z-Wave parameters
The HomeSeer HS-WD200+ works differently. It has seven individual status LEDs running down the face of the switch, and controlling them requires writing Z-Wave configuration parameters directly using zwave_js.set_value. There are no friendly entities for LED colour on the HS-WD200+. You go straight to the parameter level.
The parameters you need are:
| Parameter | Property | What it does |
|---|---|---|
| 13 | property: 13 | LED custom mode on/off (1 = custom, 0 = normal) |
| 21–27 | property: 21 through property: 27 | Colour for LED 1 through 7 (0=off, 1=red, 2=green, 3=blue, 4=magenta, 5=yellow, 6=cyan, 7=white) |
To turn all seven LEDs green on an HS-WD200+:
yaml
# HomeSeer HS-WD200+ — Enable custom LED mode and set all 7 LEDs to green
- action: zwave_js.set_value
  data:
    command_class: 112
    device_id: YOUR_HOMESEER_SWITCH_DEVICE_ID
    property: 13
    value: 1         # Enable custom LED mode
- action: zwave_js.set_value
  data:
    command_class: 112
    device_id: YOUR_HOMESEER_SWITCH_DEVICE_ID
    property: 21
    value: 2         # LED 1 — green
- action: zwave_js.set_value
  data:
    command_class: 112
    device_id: YOUR_HOMESEER_SWITCH_DEVICE_ID
    property: 22
    value: 2         # LED 2 — green
- action: zwave_js.set_value
  data:
    command_class: 112
    device_id: YOUR_HOMESEER_SWITCH_DEVICE_ID
    property: 23
    value: 2         # LED 3 — green
- action: zwave_js.set_value
  data:
    command_class: 112
    device_id: YOUR_HOMESEER_SWITCH_DEVICE_ID
    property: 24
    value: 2         # LED 4 — green
- action: zwave_js.set_value
  data:
    command_class: 112
    device_id: YOUR_HOMESEER_SWITCH_DEVICE_ID
    property: 25
    value: 2         # LED 5 — green
- action: zwave_js.set_value
  data:
    command_class: 112
    device_id: YOUR_HOMESEER_SWITCH_DEVICE_ID
    property: 26
    value: 2         # LED 6 — green
- action: zwave_js.set_value
  data:
    command_class: 112
    device_id: YOUR_HOMESEER_SWITCH_DEVICE_ID
    property: 27
    value: 2         # LED 7 — green
To clear it, send property: 13 with value: 0 to return the switch to normal load-status mode.
Yes, it is more verbose than the Inovelli approach. But it works on every HS-WD200+ without exception, it works across a list of multiple device IDs in a single action call, and the parameter values are stable across firmware versions. Once you have it built once, you copy and paste it.
If you have a mix of HomeSeer and Inovelli switches like I do, you will end up with both approaches in the same automation. The zwave_js.set_value calls for HomeSeer devices and the entity-based calls for Inovelli. They run in sequence or in parallel, and the end result is the same colour across all of them regardless of manufacturer.
Using LED colour for safety alerts
The waste reminder is a convenience. The leak sensor is something else.
My cold room has a water leak sensor. When it detects moisture, an automation fires within five seconds. It sends actionable notifications to both phones, but it also immediately turns every switch in the house to fast-blinking cyan. All 30 of them. Walk into any room and you know something is wrong before you have even looked at your phone.
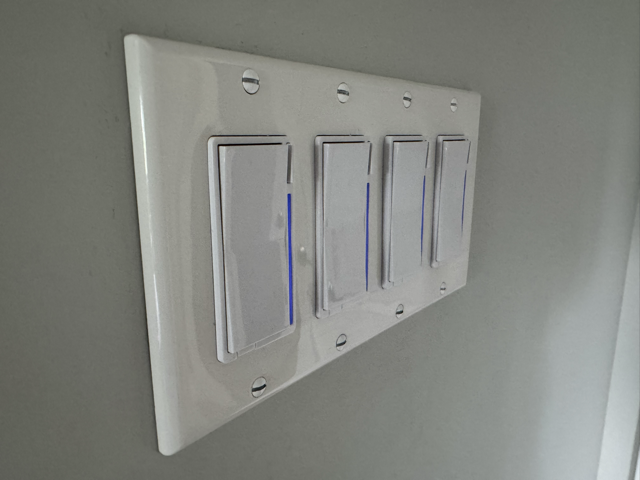
The colour choice matters. Green is already used for the waste reminder so it reads as routine. Cyan is not used for anything else. When the switches go that colour you know it is not normal. The blinking effect versus the solid effect adds urgency. Both phones also get a notification with an “All Clear” button. Tapping it restores all LEDs back to their previous states and clears the alert.
The same concept works for any sensor you care about: a sump pump float switch, a freezer temperature sensor crossing a threshold, a CO detector, a door held open too long. Pick a colour that is not used for anything routine, use a blink or pulse effect to signal urgency, and pair it with an actionable notification that lets you dismiss it once handled. The switches become a passive ambient display that communicates status without making any noise at all.
Finding Your Device IDs
Every YAML block above uses YOUR_SWITCH_DEVICE_ID. Here is how to find the real value:
- Go to Settings → Devices & Services → Z-Wave JS
- Find your switch and click it
- Look at the URL. It ends with something like
/config/devices/device/abc123def456 - That last segment is the device ID
When building an automation through the visual editor, selecting your switch as a device trigger populates the device ID automatically. Switch to YAML mode to copy it out.
What to Build Next
The pattern is the same for every room. Pick a switch, decide what a double tap should do, build one automation to test it. Once it works, you have the template for every other switch in the house.
The LED capability is worth thinking about separately from multi-tap. It answers a different question . Not “what should happen when I tap this switch” but “what should this switch tell me when I walk past.” Those are two different jobs and this hardware does both.
For a look at more complex automations running alongside these across the house, including camera-based presence detection and room-level control, check out the UniFi Camera Automations article.
If you build something from this, or you have a tap pattern I have not thought of, let me know on the Smart Home Secrets Facebook page. Always curious what other rooms people are applying this to.
So go ahead and double tap something.
Smart Home Secrets is reader-supported. We may earn a commission if you buy through our links.