Blueprint #7: Local Voice Control & Ditching Google Home for Piper, Whisper, and openWakeWord
📅 Published: April 2026 | ✍️ By Brad Andrews | ⏱️ 18 min read
I have wanted to ditch Google Home for years. I finally did with Home Assistant Local Voice.
The privacy angle was always there in the back of my mind. Every voice command I sent through a Google device was leaving my house, hitting a server I have no visibility into, and coming back with an answer. I accepted that trade-off for a long time because the experience was good enough. Then my Lenovo Smart Display started flickering. Rolling lines across the screen, reboots that would buy it another few days. It limped along for a while. Eventually it became unusable. I managed to factory reset it and wipe the data before it fully died, which felt like the right way to end that chapter.
I looked at my options. Buy another Google display and sign up for another few years of cloud dependency. Or finally do what I had been putting off and build something local.
I built something local. It took longer than I expected and worked better than I hoped. This is the full blueprint.
What “Home Assistant Local Voice” Actually Means
Before we get into setup, it is worth being precise about what local voice control means in the context of Home Assistant. If you have not set up Home Assistant yet, Blueprint #1: Getting Started covers that from scratch.
When you ask Google Home or Alexa a question, here is what actually happens: your wake word is detected on-device, your voice is streamed to a cloud server, the server transcribes and interprets it, sends a command back, and your device responds. Every step after the wake word leaves your home. Round-trip latency is typically 1.5 to 3 seconds on a good day.
With a fully local setup, none of that happens. Your voice never leaves your network. The wake word is detected locally on the Voice PE, the Satellite1, or the browser running the Voice Satellite Card. The audio is transcribed by a model running on your own hardware. The intent is interpreted locally. The response is synthesized by a TTS engine running on your server and played back through the satellite. The only network hop is between devices on your LAN.
The practical trade-off is real. Wake word accuracy is not quite at Google’s level. Response speed depends on the hardware you throw at it. And the setup is not plug-and-play. But privacy is not compromised, and when it works, it works fast.
The Three Engines Behind Home Assistant Local Voice
Three add-ons in Home Assistant handle the heavy lifting. They run as containers on your Home Assistant host (or Proxmox VM, in my case), and they chain together to form a complete voice pipeline.
Piper Text to Speech
Piper converts text into spoken audio. When your automation says “dinner is ready” through a satellite, Piper is what generates that voice.
Piper runs locally, processes quickly on CPU alone, and sounds significantly better than the older HA Cloud TTS voices. The quality varies a lot by voice model, though. After testing several, I landed on en_US-libritts_r-high as my preferred voice. It sounds natural without being robotic, and the high-quality variant handles sentence rhythm better than the medium models.
You install Piper through the Home Assistant Add-on Store: Settings > Add-ons > Search “Piper.”
After installing, configure the voice in the add-on settings. The voice name format is [language]-[model]-[quality]. Set it to en_US-libritts_r-high and click Save.
Faster Whisper Speech to Text
Faster Whisper converts your spoken words into text that Home Assistant can act on. It is the other half of the voice pipeline.
OpenAI trained and open-sourced the original Whisper model. The faster-whisper implementation used in HA is an optimised local inference server that runs entirely on your hardware and never contacts any external service.
Install it through the Add-on Store: Settings > Add-ons > Search “faster-whisper.”
The key configuration choice is the model size. Faster Whisper offers several: tiny, base, small, medium. Larger models are more accurate but require more RAM and take longer to process. For most home setups, small is the right balance. If you are on a Raspberry Pi 4, start with tiny and work up.
One Proxmox-specific note: if faster-whisper crashes on startup with a RuntimeError: NumPy was built with baseline optimizations error, set your VM’s CPU type to host in Proxmox. The default kvm64 type strips the x86-64-v2 instruction set flags that NumPy requires. Change it under your VM > Hardware > Processors > Type: host. This is a known regression (HA core issue 162460) and the CPU type change resolves it completely.
openWakeWord Wake Word Detection
openWakeWord listens continuously for your trigger phrase. It runs on the satellite device itself, which means audio is never streamed anywhere until the wake word fires.
Install it through the Add-on Store: Settings > Add-ons > Search “openWakeWord.”
The default models include “Hey Jarvis,” “OK Nabu,” and a few others. Out of the box, openWakeWord handles basic wake word detection. For custom wake words, you need a different approach covered in the section below.
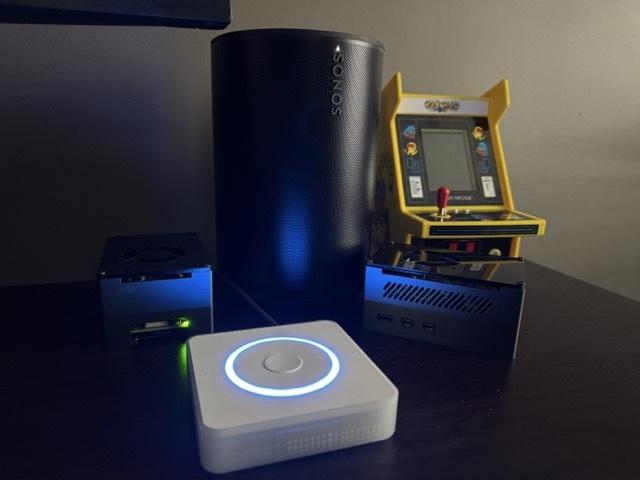
Hardware: What I Actually Run
I have three satellite devices in my setup for Home Assistant local voice control. Each one is dedicated to voice input/output in its room and doubles as a presence indicator and notification speaker.
2x Home Assistant Voice PE: One in my office, one in the master bedroom. These are purpose-built for HA voice. They run ESPHome natively, have a good microphone array, and support local wake word detection on the device itself rather than relying on the server. Available directly from Home Assistant.
One honest note on the Voice PE: wake word detection and response quality are solid, but the built-in speaker is limited by its low-profile design. For voice commands and TTS announcements it is fine. If you plan to use it for music playback or just want better audio quality, it has a 3.5mm jack. Plug in an external speaker and the difference is significant.
1x FutureProofHomes Satellite1: In the kids’ playroom. The Satellite1 is a purpose-built ESPHome-based voice satellite from FutureProofHomes, available as the PCB Dev Kit (the board itself) and the Smart Speaker Enclosure Kit (the housing).
I ordered it as a fun project to build with the kids and assemble a speaker from scratch, see what goes inside, get them interested in how things work. They were not quite as enthusiastic as I was, but they did help, and they got to see the actual components before the enclosure went on. I am calling that a win.
The sound quality is genuinely good. I was happy with it straight out of the build.
The placement story is a bit roundabout. I ordered it before I had set up the Voice Satellite Card on the kitchen tablet. By the time it was working, the kitchen slot was already covered. Most other rooms in the house have Sonos speakers, so there was no obvious gap. The playroom turned out to be the perfect fit and we do not group audio there, so a standalone satellite makes sense, and the kids use it constantly for story time.
Kitchen tablet (Voice Satellite Card): The kitchen tablet runs the Voice Satellite Card, configured from the left navigation menu under Voice Satellite. No additional hardware required. It uses the browser’s microphone and connects to the same voice pipeline as the physical satellites. More on the full settings in its own section below.
If you are starting from scratch, the Voice PE is the path of least resistance. It is designed for exactly this use case and requires the least configuration to get running.
The Wake Word Problem (And How I Solved It)
The wake word choice matters more than most people expect, and I wasted time finding that out.
The first wake word I tried was “Alexa.” I had the logic that it was familiar and easy to say naturally. The reality was constant false positives. The TV would trigger it. Conversations in the kitchen would trigger it. Kelly’s calls would trigger it. Within two days the spouse approval rating had cratered and I was back to square one.
The lesson: wake word length and phonetic distinctiveness matter enormously. Single-word phrases with common phoneme patterns are going to misfire constantly. You need something longer and unusual enough that normal speech does not contain it.
I landed on “Hey Cortana.” Not because of any particular fondness for the Microsoft assistant, but because the TaterTotterson microWakeWords repository includes a well-trained model for it, and it is phonetically distinctive enough that I have not had a false positive since switching.
How the Voice PE Handles Wake Words
There is an important distinction to understand here: the Home Assistant Voice PE uses micro_wake_word. A separate, on-device model format, rather than the openWakeWord add-on running on the server. The Voice PE detects the wake word locally on the ESP32-S3 chip and only streams audio to your server after detection. This is more efficient and more private.
The openWakeWord add-on handles wake word detection for devices that do not have on-device detection capability. Both the Voice PE and the Satellite1 detect the wake word locally and only stream audio to the server after it fires. The Voice Satellite Card uses the browser’s Web Speech API for the same purpose. openWakeWord becomes relevant if you are running a simpler satellite that lacks on-device processing.
Flashing a Custom Wake Word to Voice PE
You need the ESPHome Device Builder add-on installed: Settings > Add-ons > ESPHome Device Builder.
The TaterTotterson microWakeWords repository lives at github.com/TaterTotterson/microWakeWords. The TaterTotterson repo includes pre-trained models for several wake word options. You have two ways to reference them in your ESPHome YAML: point directly to the raw JSON URL on GitHub as shown in the examples below, or download the .json and .tflite files and host them locally in /config/www/custom_models/, then reference http://homeassistant.local:8123/local/custom_models/your_model.json instead. Both work and the GitHub URL is simpler to get started, while local hosting avoids any dependency on an external URL at compile time.
The override YAML looks like this:
yaml
micro_wake_word:
  models:
    - model: https://raw.githubusercontent.com/TaterTotterson/microWakeWords/refs/heads/main/microWakeWordsV2/hey_cortana.json
      id: hey_cortana
The id field is a label ESPHome uses internally. Set it to something short and descriptive that matches your chosen phrase.
You can also load multiple models at once if you want to test a few side by side:
yaml
micro_wake_word:
  models:
    - model: https://raw.githubusercontent.com/TaterTotterson/microWakeWords/refs/heads/main/microWakeWords/alexa.json
      id: alexa
    - model: https://raw.githubusercontent.com/TaterTotterson/microWakeWords/refs/heads/main/microWakeWordsV2/hey_cortana.json
      id: hey_cortana
After saving and flashing the device, go to Settings > Devices & Services in Home Assistant, find your Voice PE device, and open its settings. Change the wake word dropdown to the model you just installed. Without that change the device will not know which of the loaded models to actively listen for. The on-device detection means none of this adds any load to your server.
Your mileage will vary. Wake word performance depends on your voice, your pronunciation, and your accent. What works reliably for me may not work as well for you. It is worth trying a few different models from the TaterTotterson repo to find one that feels natural and consistent for your household. If none of the pre-trained options hit the mark, TaterTotterson also provides a training program that lets you attempt building your own custom wake word model from scratch. It takes more effort, but it is there if you need it.
Note on the KeyError regression: As of early 2026, there is an open bug in certain ESPHome builds where micro_wake_word configuration throws a
KeyErrorduring compilation (GitHub issue 165734). If you hit this, try rolling back to ESPHome 2024.12 or check the issue thread for a current workaround. It is an active regression, not a configuration problem on your end.
Building the Voice Pipeline in Home Assistant
With the three add-ons installed and your satellites connected, the next step is wiring them into a voice assistant pipeline.
Go to Settings > Voice Assistants. Click Add Assistant.
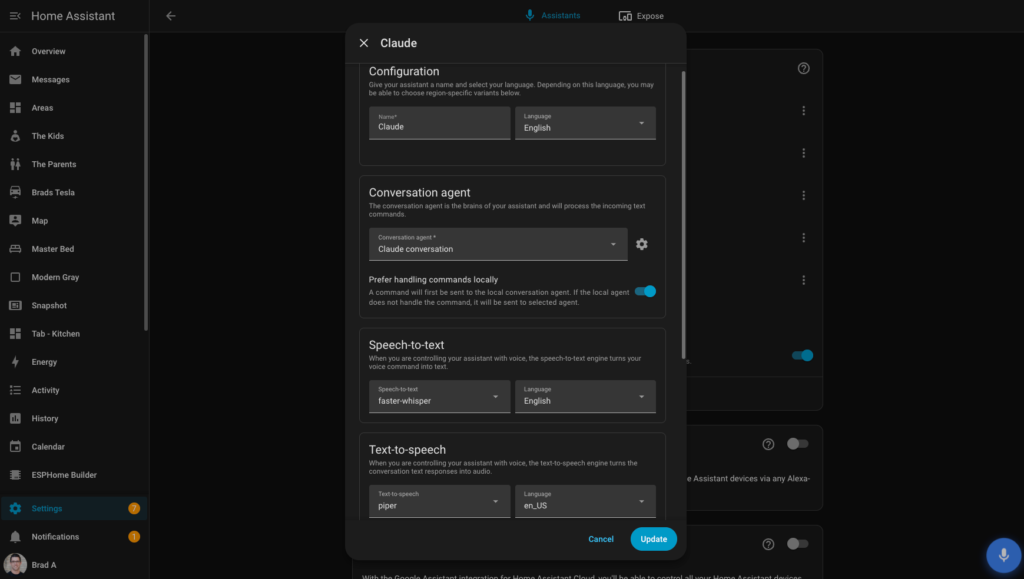
Give the pipeline a name. Then configure each component:
- Speech to text: Select faster-whisper and choose your language
- Text to speech: Select Piper, set language to en_US, and choose your voice, libritts (high) is the one I recommend
- Conversation agent: Select your Claude conversation agent (set up in the next section)
- Prefer handling commands locally: Toggle this on. Simple device commands will be handled by the local HA agent first. Only requests the local agent cannot handle get sent to Claude. This saves latency and API cost on straightforward commands like turning lights on and off.
The Streaming wake word engine section at the bottom of the pipeline config is for devices that use a server-side wake word engine. If you are using a Voice PE or Satellite1, you will see a note that most recent devices use on-device wake word engines configured on their device page, which is exactly what the ESPHome setup in the previous section handles. You can leave openWakeWord loaded here as a fallback for any device that does not have on-device detection.
Using Claude as the Conversation Agent
This part of my setup is still evolving. I want to be upfront about that. What follows documents what is working now, not a finished product.
Why an LLM Instead of the Built-in Agent?
The built-in HA conversation agent is excellent for device control commands. “Turn off the kitchen lights.” “Lock the front door.” “What is the temperature in the office.” For those use cases, it is reliable and fast.
Where it falls short is anything conversational or contextual. “What should I make for dinner given what is in my fridge and when we need to leave tonight?” or “What is on the kids’ schedule tomorrow?” are not commands the built-in agent can handle.
Claude handles both. It can control devices and carry a conversation. The trade-off is that every command now involves a round-trip to Anthropic’s API. For device control this adds maybe 500ms. For conversational questions it adds a second or two. That is a reasonable trade-off for the capability gain, in my view.
Setting Up the Anthropic Integration
First, install the Anthropic integration in Home Assistant: Settings > Devices & Services > Add Integration > Anthropic.
You will need an Anthropic API key. Get one at console.anthropic.com.
⚠️ Before you start: Set a monthly usage limit in the Anthropic console under Settings > Limits. It is easy to forget the API is running in the background and end up with a larger bill than expected. I set mine to $10 per month, which is more than enough for daily home assistant use. Without a limit, a misconfigured automation or a busy household could quietly run up charges before you notice.
The model I recommend is claude-haiku-4-5. It is the fastest Anthropic model, which matters a lot when voice latency is your primary concern. Sonnet produces better complex reasoning, but the latency difference is noticeable in voice interactions. Haiku handles home automation commands and conversational questions well.
Set the model in the integration configuration after authenticating with your API key.
The System Prompt
The system prompt is the instruction set Claude works from on every interaction. A minimal starting prompt looks like this:
You are a home assistant for Brad's house. You have access to Home Assistant device controls.
Keep responses short, two sentences maximum unless asked for detail.
Do not introduce yourself or use filler phrases. Answer directly.
When controlling devices, confirm what you did in one short sentence.
Today's date is {{ now().strftime('%A, %B %d') }}.
That last line uses a Jinja2 template to inject today’s date dynamically, which is useful for calendar and schedule questions.
My actual prompt is longer than this. I have added rules over time as I found things that annoyed me: Claude occasionally wanting to explain its reasoning out loud when I just wanted a light turned on, responding too verbosely to simple questions, using phrases I found stilted. The honest answer is that the pre-prompt is a living document. I add a rule every week or two when something bothers me enough to fix it.
The Voice Satellite Card
If you have a tablet in your home running the Home Assistant dashboard. A kitchen tablet, a hallway panel, anything then the Voice Satellite Card turns it into a voice satellite without any additional hardware.
The card is a HACS frontend integration developed by jxlarrea. Install it through HACS (Frontend > Explore & Download Repositories > Voice Satellite Card). After installation, access it from the left navigation menu under Voice Satellite.
Setting Up the Satellite Entity
Before you can use the card, you need to create a satellite entity for the device. Go to Settings > Devices & Services > Voice Satellite and add a new entry. Each physical device needs its own entity, you cannot share one entity across multiple browsers or tablets. Once created, go back to Voice Satellite in the left nav and assign it under Satellite Entity.
Settings Worth Knowing
The Voice Satellite left nav exposes a full settings panel. Here is what you will find and how I have mine configured on the kitchen tablet:
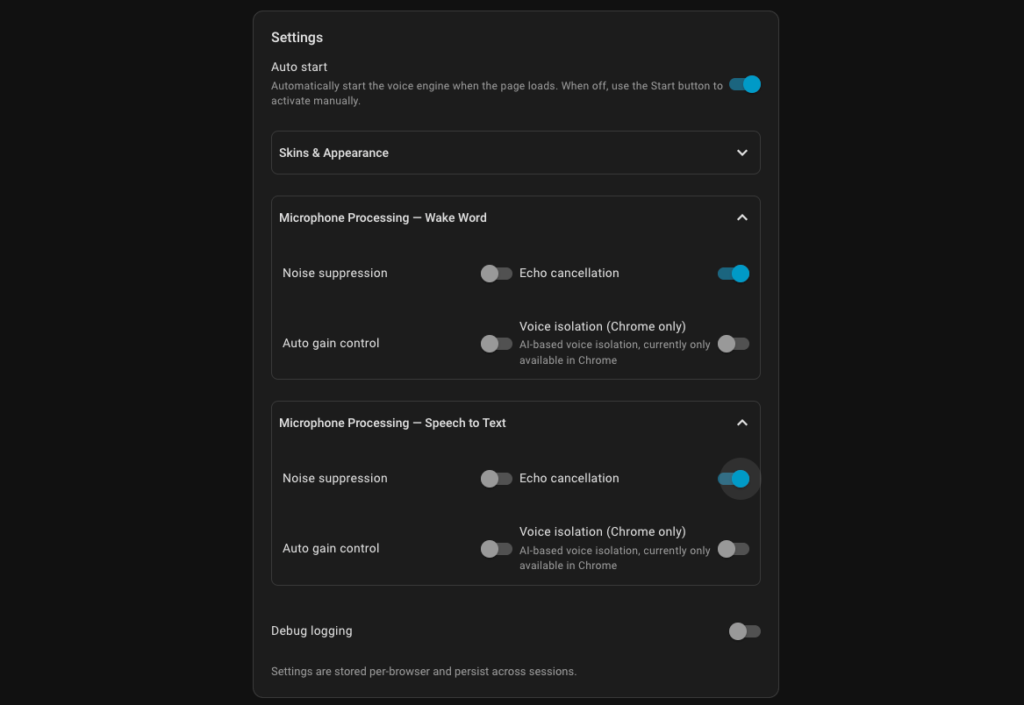
Auto start: Toggles whether the voice engine starts listening automatically when the page loads. I have this on so the kitchen tablet is always ready without anyone having to tap anything.
Skins and Appearance: Choose a skin, set theme mode (Auto follows your HA theme), adjust text scale, background opacity, and add custom CSS if you want to go further. I use the Alexa skin on my kitchen tablet, it has a clean look that works well in a always-on display context.
Reactive activity bar: Animates the bar at the bottom in response to audio levels. On a slower tablet you may want to bump the update interval up from the default 33ms to 50ms to reduce CPU load.
Microphone Processing, Wake Word, and Speech to Text: Both sections offer noise suppression, echo cancellation, auto gain control, and voice isolation (Chrome only). I had to leave noise suppression, auto gain control, and voice isolation all off on my Samsung Galaxy Tab S9 FE to avoid false triggers. Echo cancellation stays on. Your results will vary depending on your device and environment, worth experimenting with rather than assuming the defaults are right.
Wake Word Tester: This is a genuinely useful tool. Select your model, set sensitivity, hit Start, and it visualises wake word detection probability in real time as you speak. The probability curve needs to cross the dashed threshold line to trigger. Use this to confirm your model is detecting reliably from your usual distance before assuming something is broken.
Screensaver: You can enable a Voice Satellite screensaver, or assign an external screensaver entity. The external entity option is designed to work with Fully Kiosk Browser’s screensaver and the selected switch turns off when a voice interaction starts and turns back on when it ends.
Browser and iOS Considerations
Two things worth knowing before you spend time troubleshooting.
First, HTTPS is required. Browser microphone access is blocked on plain HTTP connections. Your Home Assistant instance must be accessible over HTTPS for the card to function. If you are using Nabu Casa Remote Access, this is handled automatically. If you are using a reverse proxy, confirm your SSL certificate is valid and your HA URL is set to HTTPS under Settings > System > Network > Home Assistant URL.
Second, iOS Safari behaves differently. On iOS, Web Speech API access requires a user gesture to initiate. The card cannot auto-start listening on page load. You tap to activate, it listens, then returns to idle. This is a browser security constraint, not a card issue. If your tablet is running Android or a dedicated kiosk browser like Fully Kiosk, this does not apply.
My kitchen tablet runs Android in Fully Kiosk Browser with Auto start on. It stays in always-listening mode and the screensaver integration means it hands off cleanly when a voice interaction starts. Below is a screenshot of the settings that work best for me on my Samsung Galaxy Tab S9 FE+, you likely will want to start with the same settings.
Piper Latency: The Proxmox Fix
When I first got the full pipeline running, Piper TTS responses had noticeable lag. A two-second pause between my question finishing and the spoken reply starting. That is long enough to make voice interaction feel sluggish.
The fix was straightforward but not obvious from the documentation: I bumped my Proxmox VM from 4 cores and 8GB RAM to 8 cores and 16GB RAM.
Piper generates audio in real time as it synthesizes speech. With insufficient CPU headroom, it cannot keep up with playback speed on longer responses. The result is that first-word latency is high because the engine is generating audio faster than baseline but still behind where it needs to be.
With 8 cores available, Piper processes a typical one-sentence response in under 300ms on my setup. The difference in perceived responsiveness is significant.
If you are on a dedicated hardware host rather than a VM, you may not need this adjustment. The Voice PE handles its own TTS locally for simple responses, so latency is most noticeable on longer, LLM-generated answers that require server-side synthesis.
Putting It All Together: My Daily Setup
Here is what the running system looks like in practice.
I say “Hey Cortana” in my office. The Voice PE detects the wake word on-device, starts the listening indicator, and streams audio to my server. Faster Whisper transcribes it. If it is a device command, the Claude conversation agent handles it and instructs HA. If it is a question, Claude answers it. Piper synthesizes the response and it plays through the Voice PE speaker.
Day to day, I use it for the same things you would expect from any smart speaker: controlling lights, asking for the weather, checking what is on the calendar. That part just works.
Where it genuinely surprised me is the storytelling. Claude as the conversation agent means I can ask it to make up a story on the spot. My son can be the hero of an adventure in Cotton Candy Land, or a famous explorer of the jungle with his dog as the sidekick. My daughter can be a famous pop star in her stories. The kids ask for stories by theme and the whole thing plays through the satellite speaker in the playroom. That is not something Google Home ever offered, and it has become one of the features the family uses most.
The other heavy use case is announcements for the kids. The house tells them when to get dressed in the morning, when to get shoes on for school, when to start getting ready for bed. Timed automations trigger TTS announcements through the relevant satellites. When the house says it, there is somehow less negotiating than when a parent says it. Sorry kids, the house said so.
For automations, I have a separate pipeline configured that skips the LLM entirely. TTS announcements for package detection, the doorbell automations, backyard alerts, and the daily briefing all use the built-in HA TTS with Piper. Using Claude for announcement audio would add unnecessary latency and API cost. The LLM pipeline is only for interactive voice commands where I need it.
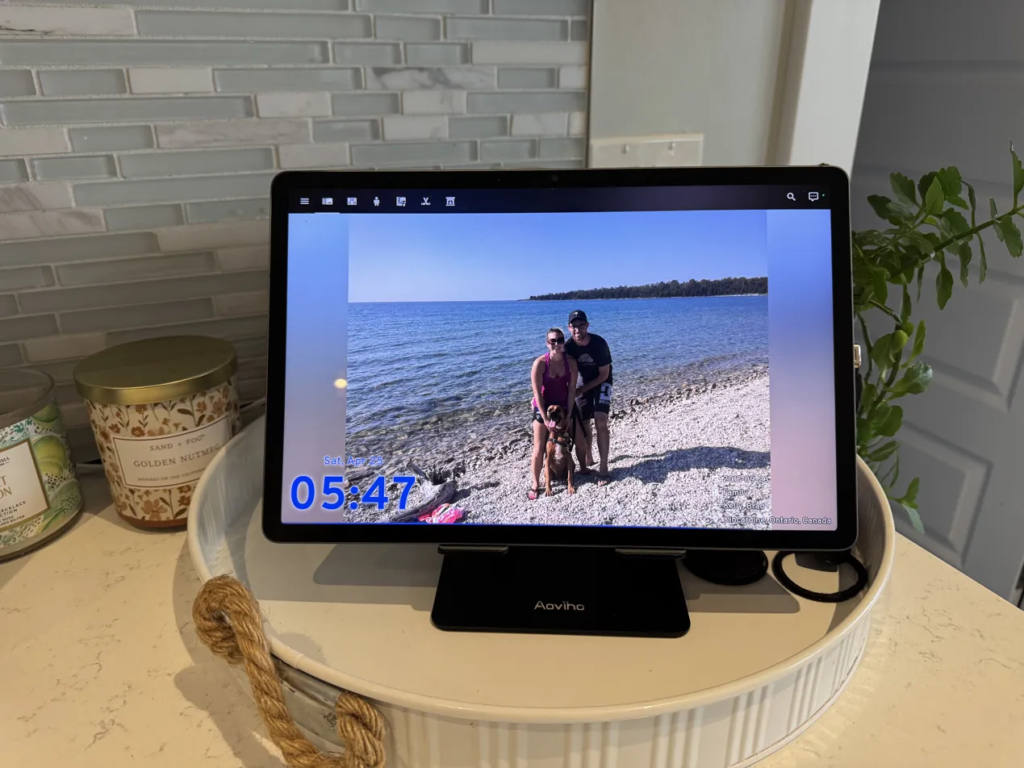
Kelly uses the kitchen tablet more than the physical satellites. The tablet runs Immich in the foreground showing our family photos, but the Voice Satellite Card is running silently in the background the whole time. There is no visible interface, no button to tap, no indicator to look at. The tablet just listens. You can be looking at a photo of last summer’s vacation and ask what is on the calendar tomorrow, and it answers. If you want to see everything the kitchen tablet does beyond voice, I wrote a full breakdown in How I Replaced My Nest Display With a Fully Local Kitchen Tablet. The fact that it required no new hardware was a meaningful factor in the spouse approval calculation.
What Still Needs Work
I want to be honest about where this is not perfect yet.
Wake word detection has occasional misses. The Voice PE sensors miss maybe one in fifteen commands in a noisy environment (TV on, music playing). Google Home was better at this. I have not found a way around it yet, it is a hardware limitation of the current microphone array, not a software problem.
Response speed for LLM commands is slower than Google. A device control command via Claude takes about 1.5 seconds end to end. Google was under a second. For me, the privacy trade-off is worth it. Others might weigh that differently.
The pre-prompt is genuinely never finished. Claude occasionally surprises me with a response style I want to correct. I keep a running note of adjustments to make. This is not a criticism of the model, it is an honest reflection of what it means to tune a conversational assistant for your specific preferences.
The Bottom Line
Local voice control in Home Assistant is real, functional, and private. The setup takes an afternoon and some patience. The results are not identical to Google Home. In some ways they are better. In a few ways they are not quite there yet.
The Lenovo Smart Display dying was the push I needed. I have not missed Google Home once since.
Smart Home Secrets is reader-supported. We may earn a commission if you buy through our links.