📅 Published: March 2026 | ✍️ By Brad Andrews | ⏱️ 8 min read
This is Part 2 of The Blueprint Series step-by-step roadmaps for taking full control of your connected home. If you haven’t installed Home Assistant yet, start with Part 1: Install Home Assistant From Scratch before continuing. Everything we’re building here depends on that foundation.
Here is something most smart home tutorials skip right past: your phone already knows where you are. It knows when you leave home, when you arrive at work, when you pull into a parking lot, and when you are three minutes from your front door.
Home Assistant can use all of that. And once it does, a whole category of automations becomes available that have nothing to do with buttons, schedules, or voice commands automations that just fire because you went somewhere.
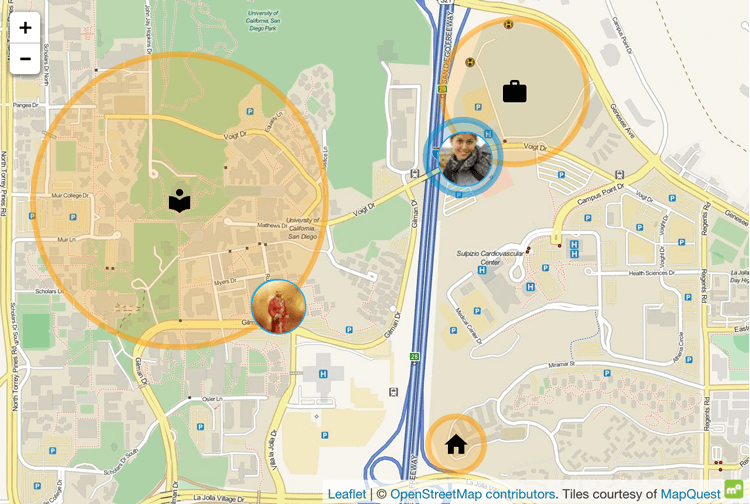
That is what zones are. Think of them as invisible fences drawn on a map around the places that matter to your family. Your home. Your workplace. The kids’ school. The grocery store you stop at twice a week. When your phone crosses one of those boundaries, Home Assistant knows and can act on it instantly, silently, without you touching anything.
I run five zones. Three of the automations they power are things my wife would genuinely notice if they stopped working tomorrow. One of them the kids school drop-off notification gets brought up every time someone asks me what smart home automation is actually for.
The setup takes about twenty minutes. The automations you get out of it will run quietly in the background for years. Keep reading to see how I set it up or if you are already familiar with zones and just want the automations, skip ahead to Step 3.
What Zones Actually Do
Every zone has three components: a name, a GPS coordinate at its centre, and a radius that defines how close you need to be before Home Assistant considers you inside it. When a tracked device your phone, your partner’s phone, anyone running the Companion App enters or exits that radius, Home Assistant fires a trigger.
That trigger can do anything an automation can do: send a notification, turn on a light, open a garage door, update a sensor, run a script. The phone does not need to be unlocked. The user does not need to do anything. It just happens.
The Home Assistant Companion App, available for iOS and Android, handles the location tracking. It is free, and it works extremely well on both platforms I run it on iPhone alongside my wife, and neither of us has had to think about it since setup day.
Step 1: Install the Companion App and Enable Location Tracking
If you have not done this yet, download the Home Assistant Companion App and log in with your Home Assistant account.
During setup, the app will ask for location permission. Grant it Always Allow on iOS, Allow all the time on Android. This is what enables background location updates that power zone automations.
Once connected, your phone will appear in Home Assistant as a device_tracker entity. You will see it in Settings → Devices & Services → Companion App.
Insider tip: After adding yourself as a tracked person, go to Settings → People and assign your device tracker to your person. This is what lets you write automations using
person.bradinstead of a rawdevice_trackerentity cleaner, and it supports multiple trackers per person down the road when we build out proper presence detection in Blueprint #6.
Step 2: Configure Your Zones
Home Assistant automatically creates a Home zone using the location you set during onboarding. You can edit it and you should add more.
Go to Settings → Areas & Zones → Zones to manage them visually on a map, or define them in configuration.yaml for more control.
Here is an example of what your configuration.yaml zone setup might look like if you are running a similar mix of locations home, an office, two schools, and a couple of regular stores:
# configuration.yaml
# Each zone needs a name, GPS coordinates, radius (metres), and icon.
# Use !secret for coordinates  they are real location data you do not
# want sitting in plain text in a shared config file.

zone:
  - name: Home
    latitude: !secret home_latitude
    longitude: !secret home_longitude
    radius: 100        # metres  tighter than the default 100m is fine here
    icon: mdi:home

  - name: Work
    latitude: !secret work_latitude
    longitude: !secret work_longitude
    radius: 150        # slightly larger for an office building with a parking lot
    icon: mdi:briefcase

  - name: Kids School
    latitude: !secret kids_school_latitude
    longitude: !secret kids_school_longitude
    radius: 100
    icon: mdi:school

  - name: Partner School
    latitude: !secret partner_school_latitude
    longitude: !secret partner_school_longitude
    radius: 100
    icon: mdi:school

  - name: Grocery Store
    latitude: !secret grocery_latitude
    longitude: !secret grocery_longitude
    radius: 500        # larger radius  intent is to catch you nearby, not already there
    icon: mdi:cart
Your actual coordinates go into secrets.yaml replace the XX.XXXXX placeholders with the real values for each location:
# secrets.yaml  never commit this file to a public repository
home_latitude: XX.XXXXX
home_longitude: -XX.XXXXX
work_latitude: XX.XXXXX
work_longitude: -XX.XXXXX
kids_school_latitude: XX.XXXXX
kids_school_longitude: -XX.XXXXX
partner_school_latitude: XX.XXXXX
partner_school_longitude: -XX.XXXXX
grocery_latitude: XX.XXXXX
grocery_longitude: -XX.XXXXX
To find coordinates: open Google Maps, long-press any location, and the latitude/longitude will appear at the top of the screen.
Getting the Radius Right
This is where most people have to do a bit of trial and error, and it is worth spending five minutes on.
Too large and you trigger automations by accident. The classic example: a garage door automation that opens when you arrive home except it fires when you stop at a neighbour’s house two doors down, or pull into a store in the same plaza. Your radius needs to be tight enough that entering the zone means you are genuinely there, not just nearby.
Too small and the automation fires after you have already arrived. The zone boundary sits closer to the building than the driveway, the parking spot, the front path and by the time the trigger fires, you are standing in the kitchen.
My general starting points: 100m for residential locations, 100–150m for office buildings with a parking lot. For reminder-style zones like a grocery store where the intent is to catch you nearby rather than confirm you have arrived go much larger, around 500m. That gives you enough lead time to actually decide to stop rather than triggering when you are already pulling out of the lot.
One more thing on radius: GPS accuracy on a phone is typically within 5–20 metres in good conditions, but can drift 50m or more in urban canyons, underground parking, or inside large buildings. If you have an automation that needs to be precise like a door lock add a dwell time condition (covered below) rather than relying on the zone entry alone.
Step 3: The Three Automations Worth Building Right Now
Automation 1: Kids School Drop-Off Confirmation
This one is my favourite, and it uses nothing you do not already have.
My wife is a teacher and needs to be at her school earlier than I need to be at the office. Most mornings I do the school run with the kids. Once I drop them off, my wife wants to know they made it I used to send her a text when I left the school. Then I automated it instead.
So Home Assistant tells her automatically.
When my phone enters the Kids School zone during the morning drop-off window, HA waits 60 seconds to confirm I am actually there not just driving past then sends my wife a notification on her phone. It can only fire once per day. No duplicate messages, no false positives, no explaining to your wife why it told her the kids were at school twice.
The wife approval rating on this one is extremely high. I cannot stress this enough copy this automation.
# automations.yaml (or paste into the Automation editor via YAML mode)
- alias: "Kids Drop-Off Confirmation"
  description: >
    Notifies spouse when YourName arrives at the kids school during the
    morning drop-off window. Requires 60s dwell to avoid drive-by
    false triggers. Runs once per day maximum.
  triggers:
    - trigger: zone
      entity_id: device_tracker.yourname_iphone  # replace with your device tracker entity
      zone: zone.kids_school
      event: enter
  conditions:
    - condition: time
      after: "07:30:00"   # adjust to your actual drop-off window
      before: "09:00:00"
  actions:
    - wait_for_trigger:
        - trigger: state
          entity_id: device_tracker.yourname_iphone
          to: zone.kids_school
          for:
            minutes: 1    # must be in the zone for 60 seconds before notifying
      timeout:
        minutes: 2        # if still not confirmed after 2 min, abort
      continue_on_timeout: false
    - action: notify.yourspousename_iphone   # replace with your wife/partner's notify target
      data:
        title: "Kids are at school 👍"
        message: "YourName just dropped off the kids. Have a great morning!"
  mode: single            # only one instance can run at a time
  max_exceeded: silent    # do not throw an error if it tries to run again
A few things to update for your own setup:
device_tracker.yourname_iphone→ your actual device tracker entity ID (find it in Settings → Devices & Services)zone.kids_school→ whatever you named your zone (HA slugifies the name automatically)notify.yourspousename_iphone→ your partner’s notification target (check Developer Tools → Services for available notify services)- Adjust the time window to match your actual drop-off schedule
Why
mode: singleandmax_exceeded: silent? These two lines together mean: only one instance of this automation can run at a time, and if something tries to start a second instance, fail silently rather than throwing a log error. Combined with the time window, this ensures the notification fires once in the morning and does not repeat even if the phone briefly exits and re-enters the zone.
Automation 2: Notify My Wife When I Leave Work
I run an IT services firm. My days do not end at a predictable time. Clients call, tickets come in, things break the “I’ll be home by 5:30” text has a poor track record.
This automation solves it without any action on my part. When my phone leaves the Work zone after 4pm, my wife gets a notification. She knows I am on my way. The kids know Dad is coming. Nobody is waiting by the door wondering.
- alias: "Notify Spouse  YourName Leaving Work"
  description: >
    Sends spouse a notification when YourName leaves the work zone,
    so she knows he is on his way home.
  triggers:
    - trigger: zone
      entity_id: device_tracker.yourname_iphone
      zone: zone.work
      event: leave          # fires on zone exit, not entry
  conditions:
    - condition: time
      after: "16:00:00"     # only trigger after 4pm  avoids lunch run notifications
      before: "22:00:00"
  actions:
    - action: notify.yourspousename_iphone
      data:
        title: "YourName is on his way home 🚗"
        message: "Left the office just now. Kids can get ready for hugs."
  mode: single
Adjust the time window to match your real working hours. The 4pm lower bound means a lunch errand will not trigger the “on my way home” message. If you sometimes leave for afternoon client visits, you may want to add a condition checking that it is after your typical last meeting time, or use a separate “leaving for client site” automation that notifies differently.
Automation 3: Near the Grocery Store Shopping List Reminder
This one started as a convenience and has become a genuine household system.
When I am near one of our regular grocery stores and my wife is not already there herself, two things happen: I get a notification with whatever is on our current shopping list, and my wife gets a heads-up that I am nearby in case she needs anything.
- alias: "Near Grocery Store  Shopping List Reminder"
  description: >
    When YourName is near the grocery store without their spouse,
    send YourName the current shopping list and notify spouse they are nearby.
  triggers:
    - trigger: zone
      entity_id: device_tracker.yourname_iphone
      zone: zone.grocery_store
      event: enter
  conditions:
    # Only fire if wife is NOT also at the store
    - condition: state
      entity_id: device_tracker.yourspousename_iphone
      state: zone.grocery_store
      negate: true          # negate: true means "NOT in this state"
  actions:
    - action: notify.yourname_iphone
      data:
        title: "You're near the store 🛒"
        message: "Shopping list: {{ states('sensor.shopping_list') }}"
    - action: notify.yourspousename_iphone
      data:
        title: "YourName is near the grocery store"
        message: "Anything you need him to grab?"
  mode: single
On the shopping list sensor: Home Assistant has a built-in Shopping List integration that works with the Companion App. Once enabled,
sensor.shopping_listwill contain the current items. If you use a different system a shared note, a Todoist list, a Google Keep you can adjust themessagetemplate to pull from wherever your list actually lives. I’ll go deeper on family integrations in Blueprint #5.
Privacy: A Honest Word
Tracking location in a smart home system is worth thinking through deliberately. My wife and I both know we are tracked, both opted in, and both use it the shared visibility is a feature, not a concern, in our case. We already have Find My iPhone shared between us, so the smart home layer adds utility without adding surveillance.
If you are setting this up with a partner, have that conversation first. Consent and transparency are not optional extras here. The automations above only work well and only feel good when everyone involved understands what is happening and has agreed to it.
Home Assistant keeps all of this local. Your location data does not leave your home network. There is no third-party service processing it, no cloud company building a profile. That is a meaningful difference from the Google and Apple location-sharing alternatives most people default to.
Step 4: Test Your Zones
Before you rely on any of these automations, test them.
The easiest method: Developer Tools → States in Home Assistant. Find your device_tracker entity and manually override the state to a zone name. This simulates zone entry without actually driving anywhere, and you can confirm the automation fires and the notification arrives correctly.
For the kids drop-off automation specifically test it on a weekend morning when you can drive past the school slowly and confirm the 60-second dwell time works the way you expect. Better to find out a radius needs adjusting on your own terms than have a false notification go to your wife mid-workday.
What Comes Next
Zones are the foundation. They give you one tracked device, a clear zone boundary, and a simple enter/exit trigger.
But what happens when you want two people arriving home to trigger something different than just one person arriving? What about when your phone’s GPS drifts and reports you at home when you are actually two streets away? What about the phantom “away” state that fires your away-mode automation while you are standing in your own kitchen?
That is where presence detection becomes its own discipline and it deserves its own Blueprint. In Blueprint #6: Presence Detection Building a Bulletproof Approach, we go deep on multi-sensor presence, group helpers, and the exact stack I use to make 200+ automations behave reliably every single time.
For now, get your zones configured and steal the three automations above. The kids drop-off notification alone is worth the twenty minutes this takes.
Quick Reference
| Zone | Suggested Radius | Notes |
|---|---|---|
| Home | 100m | Tighter than default is fine |
| Work (office building) | 150m | Accounts for parking lot |
| School | 100m | Add 60s dwell for drop-off automation |
| Retail / grocery | 500m | Larger radius fires while you’re nearby, not already parked |
→ Next in the series: Blueprint #3: HACS — Unlocking the Community Store (And Staying Safe)
→ Start from the beginning: Blueprint #1: Install Home Assistant From Scratch
Smart Home Secrets is reader-supported. We may earn a commission if you buy through our links.