📅 Published: April 2026 | ✍️ By Brad Andrews | ⏱️ 9 min read
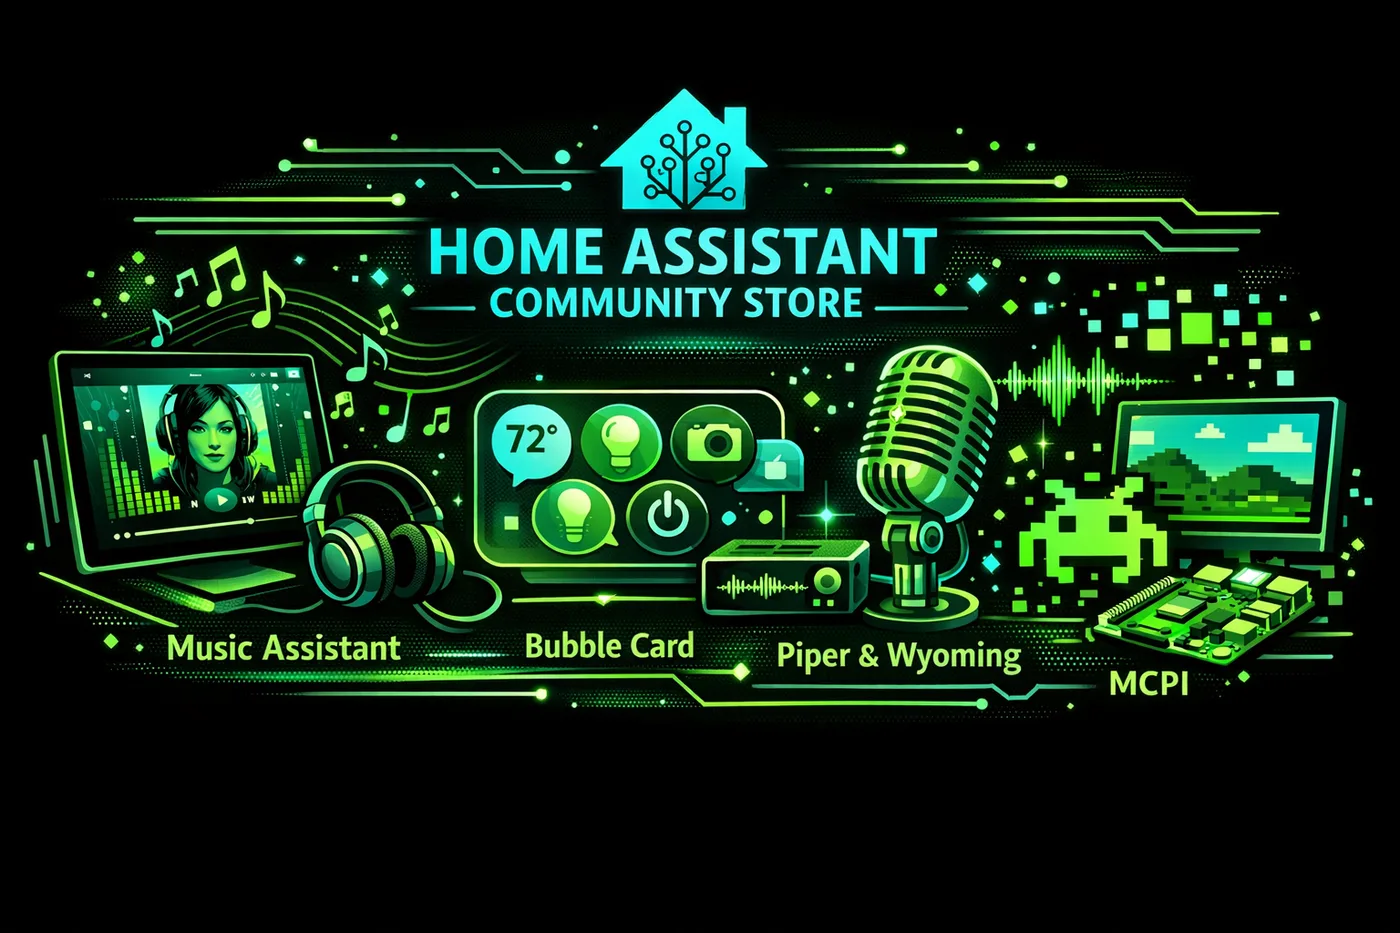
This is Part 4 of The Blueprint Series, your step-by-step roadmaps for taking full control of your connected home. If you have not installed HACS yet, start with Part 3: HACS: Unlocking the Community Store before continuing. The add-ons in this post live in the built-in Add-on Store, but several of the best extras come through HACS.
There are two stores inside Home Assistant, and most beginners only discover one of them.
The Add-on Store lives at Settings and it is the one Home Assistant shows you on day one. It runs alongside Home Assistant as separate containerised applications that extend what your system can do. Z-Wave support, text-to-speech, a code editor, a local AI voice stack. All of it lives here.
HACS, which we covered in Blueprint #3, is the community layer on top. Together, the two stores give you everything you need to build a serious setup.
This post covers the ten add-ons I have running right now, pulled directly from my live system, and why each one earns its place. My setup currently runs 3,107 entities across 35 areas and 181 automations. Every item on this list is actively doing something in that setup every single day.
Keep reading to see the full list, or skip ahead to the MCP Server entry if you want to jump straight to the most advanced item on the list.
How to Access the Add-on Store
Go to Settings > Add-ons > Add-on Store (bottom right). The store is only available on Home Assistant OS or Supervised installations. If you followed Blueprint #1, you are on the right setup.
Browse by category or use the search bar. Click any add-on, then click Install. Most add-ons have a Start on boot toggle. Enable it so they survive restarts automatically.

The List
1. Z-Wave JS UI
Where to find it: Add-on Store (community repository)
If you run Z-Wave devices like switches, locks, sensors, or dimmers, this is the most important add-on on this list. Z-Wave JS UI is a fully configurable Z-Wave gateway and control panel that gives you direct access to your Z-Wave network inside Home Assistant.
It handles device inclusion and exclusion, firmware updates, network healing, and detailed per-device configuration. The UI is far more capable than what the built-in Z-Wave integration exposes on its own.
My entire switch and lock infrastructure runs through Z-Wave JS UI. Every light switch, every exterior door lock, every sensor on every floor of the house goes through this add-on. If it stops, a significant portion of the home stops with it.
Insider tip: When I migrated from Homeseer to Home Assistant, it was Z-Wave JS UI that made the weekend migration possible. I was already running Z-Wave JS UI alongside Homeseer as a bridge, so my Z-Wave devices moved across cleanly without re-pairing a single one.
2. Music Assistant
Where to find it: Add-on Store (community repository)
Music Assistant is a free, open-source media library manager that connects to your streaming services and every speaker in your home. It runs as a standalone server and integrates directly with Home Assistant.
I have 44 media players across the entire property: Sonos speakers, Voice PE satellites, Apple TVs, tablet media players, and outdoor speakers. Music Assistant manages all of them together, including grouping, queue management, and playback control through automations.
The reason it earns this spot over a basic Sonos or Spotify integration: it is platform agnostic. It does not care whether your speakers are Sonos, Chromecast, AirPlay, or a Raspberry Pi satellite running Wyoming Protocol. It treats them all the same, which means your automations do not have to know or care either.

3. Piper (Text-to-Speech)
Where to find it: Add-on Store (official)
Piper is the text-to-speech engine that gives Home Assistant its voice. When an automation announces that the garage door is open, that dinner is ready, or that the kids have arrived at school. That is Piper speaking.
It runs completely locally. No cloud, no API key, no subscription. You pick a voice model during setup and Piper handles everything on your own hardware.
The voice quality is genuinely good. When I replaced Google Home with a fully local voice stack, the thing I was most uncertain about was whether local TTS would sound natural enough for daily use. It does. My family adapted within a day.
Piper is one third of the local voice stack. It works alongside Whisper and openWakeWord, and all three need to be installed and configured together, which we cover below.
4. Whisper (Speech-to-Text)
Where to find it: Add-on Store (official)
Whisper is the speech-to-text engine, the other half of the voice conversation. It listens to what you say, converts it to text, and passes it to Home Assistant’s voice pipeline for processing.
Like Piper, it runs entirely on your local hardware with no cloud dependency. OpenAI developed the underlying Whisper model and released it as open source. The Home Assistant team packaged it into this add-on.
Accuracy is excellent for home automation commands. It handles names, room names, and device names well once your HA instance is set up with proper entity naming. The more consistently you name things in HA, the better Whisper performs.
5. openWakeWord
Where to find it: Add-on Store (official)
openWakeWord is what makes the voice stack hands-free. It listens continuously for a wake word, which is the trigger phrase that tells your voice assistant you are about to speak a command.
Out of the box it supports a handful of built-in wake words. But the reason it earns a dedicated spot on this list is what it can do with ESPHome, which leads directly into the next entry.
All three voice add-ons (Piper, Whisper, and openWakeWord) connect through Settings > Voice Assistants in Home Assistant. You create a pipeline that chains them together: wake word detection triggers listening, Whisper transcribes, Home Assistant processes the command, Piper responds. Once it is set up, it is completely invisible.
6. ESPHome Device Builder
Where to find it: Add-on Store (community repository)
ESPHome lets you program and manage custom ESP32 and ESP8266 microcontroller devices directly from Home Assistant. It is the tool that turns inexpensive hardware into custom smart home devices with no programming experience required.
My main use for it is customising the wake words on my Voice Assistant PE units and Satellite1. All of them now respond to “Hey Cortana.” ESPHome Device Builder lets me flash and update those devices without touching a command line.
Beyond wake word customisation, ESPHome opens up a significant amount of DIY capability including custom sensors, button controllers, LED strips, and presence detection hardware. If you ever want to build something the commercial market does not offer, ESPHome is where you start.

7. File Editor
Where to find it: Add-on Store (official)
File Editor is a simple browser-based text editor for your Home Assistant configuration files. No SSH required, no command line, no FTP client. You open it from the sidebar and edit configuration.yaml, automations.yaml, secrets.yaml, or any other file directly in your browser.
It is not glamorous. It is essential.
Every YAML snippet in this Blueprint Series eventually ends up in a file. File Editor is how you get it there without leaving the Home Assistant UI. Install it on day one and leave it running.
8. Terminal and SSH
Where to find it: Add-on Store (official)
Terminal and SSH gives you command-line access to your Home Assistant system. You can open a terminal directly in the browser or connect via SSH from any device on your network.
Most users will not need this often. But when you do need it, like running the HACS installer, diagnosing a problem the UI cannot surface, or recovering from a misconfigured file, you will be very glad it is already there.
Install it during setup, before you need it. It is much easier to install from a working system than to figure out access on a broken one.
9. Adaptive Lighting
Where to find it: HACS (Integration)
Adaptive Lighting is technically a HACS integration, not an Add-on Store item, but it belongs on this list because of how much it changes daily life in a smart home.
It automatically adjusts the colour temperature and brightness of every light in your home based on the time of day, tracking the natural progression of daylight from cool and bright in the morning to warm and dim in the evening. Your lights match your circadian rhythm without any manual input.
Here is a simplified example of what an Adaptive Lighting configuration looks like:
yaml
# Adaptive Lighting is configured via the UI after installing through HACS
# Settings > Devices & Services > Add Integration > Adaptive Lighting
# The switch entity it creates can then be configured with these parameters:

# min_color_temp: 2700K  (warm white, evenings)
# max_color_temp: 6500K  (cool daylight, midday)
# min_brightness: 10%
# max_brightness: 100%
# sleep_brightness: 1%   (near-off for middle of the night)
# take_over_control: true  (pauses adaptation if you manually adjust a light)
The “take over control” setting is the one most people miss. Enable it, and Adaptive Lighting pauses for any light you manually adjust. So if you dim the kitchen for a movie, it stays dim until the next scheduled transition. It respects your intent.
I run Adaptive Lighting across every room in the house. It is one of those automations that becomes invisible infrastructure within a week. You stop thinking about your lights entirely.
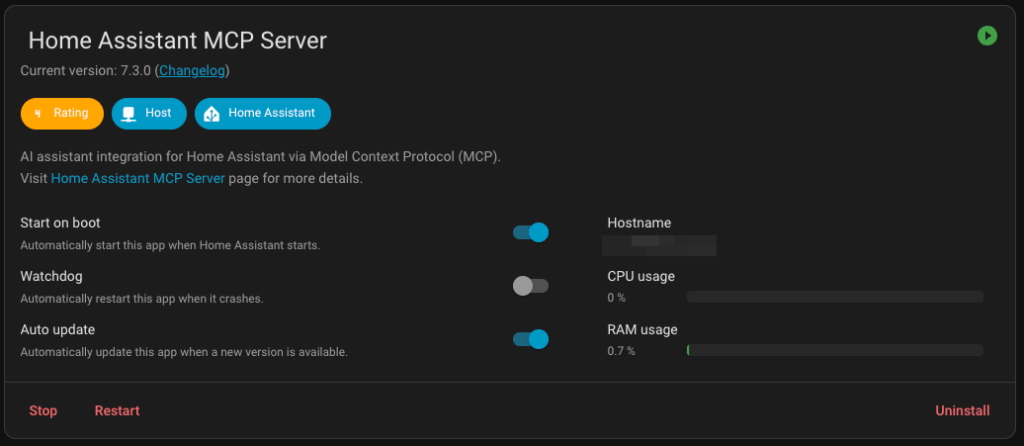
10. Home Assistant MCP Server
Where to find it: Add-on Store (community repository)
This is the most advanced item on this list, and the one most worth knowing about.
MCP stands for Model Context Protocol. The Home Assistant MCP Server add-on gives AI assistants (Claude, in my case) direct, controlled access to your Home Assistant instance. Not just the ability to answer questions about home automation in general. It provides actual read and write access to your specific setup.
What that means in practice: I use Claude with the MCP Server to create documentation on my system, troubleshoot automations, review configuration logic, add more advanced automation behaviour, and run security checks on what is running. This entire post was informed by Claude connecting live to my Home Assistant and reading what was actually installed and running.
It is a significant capability upgrade. But it comes with responsibilities that I want to be direct about.
Important: Use MCP with care. The MCP Server gives an AI assistant the ability to make changes to your Home Assistant. Always use an AI that asks for your permission before taking any action, explains clearly what it is going to do and why, and waits for your confirmation before proceeding. Never let an AI make changes in bulk without reviewing each one. Prompt your AI explicitly: “Do not make any changes without explaining what you plan to do and asking for my approval first.”
Back up before any session where changes are possible. Home Assistant has a built-in backup system under Settings > System > Backups. Run one before any AI-assisted work session. Recovery from an unwanted change is straightforward if you have a recent backup. Recovery without one is painful.
Verify everything. AI assistants are powerful but not infallible. Review every suggested change before approving it, check the logic makes sense for your specific setup, and test automations in isolation before enabling them across your whole home.
Used carefully, the MCP Server is genuinely one of the most useful things running in my setup. Used carelessly, it can make changes that take time to unpick. The difference is in how deliberately you approach it.
The Full List at a Glance
| Add-on | Source | What it does |
|---|---|---|
| Z-Wave JS UI | Add-on Store | Z-Wave network gateway and device manager |
| Music Assistant | Add-on Store | Multi-platform media library and speaker manager |
| Piper | Add-on Store | Local text-to-speech engine |
| Whisper | Add-on Store | Local speech-to-text engine |
| openWakeWord | Add-on Store | Wake word detection for hands-free voice |
| ESPHome Device Builder | Add-on Store | Custom ESP device programming and management |
| File Editor | Add-on Store | Browser-based config file editor |
| Terminal and SSH | Add-on Store | Command-line access to your HA system |
| Adaptive Lighting | HACS | Circadian rhythm lighting across all rooms |
| MCP Server | Add-on Store | AI assistant integration for your live HA instance |
What Comes Next
You now have the add-ons that make Home Assistant genuinely powerful. The next step is pulling your family’s world into it.
In Blueprint #5: Syncing Your Family’s Calendars Into Home Assistant, we connect multiple Google and iCal calendars including work, personal, school, and family, and wires them into the daily briefing dashboard and voice automations that make the whole house feel like it is paying attention.
Next in the series: Blueprint #5: Syncing Your Family’s Calendars Into Home Assistant
Previous: Blueprint #3: HACS: Unlocking the Community Store (And Staying Safe)
Start from the beginning: Blueprint #1: Install Home Assistant From Scratch
Smart Home Secrets is reader-supported. We may earn a commission if you buy through our links.